(→Trivia: Some spelling corrections.) |
(Undo revision 166782 by Relativus (talk) It's not always a 100% necessary end to complete the mission) |
||
| (197 intermediate revisions by 67 users not shown) | |||
| Line 1: | Line 1: | ||
| + | {{Spoilers}} |
||
| − | {{Spoilers}}'''The Light at the End '''is the final mission in [[Dishonored]]. It takes place on Kingsparrow Isle. |
||
| + | {{Mission |
||
| + | |image = Kingsparrow1.jpg |
||
| + | |Target = [[Farley Havelock]]<br>[[Treavor Pendleton]]<br>[[Teague Martin]] |
||
| + | |Location = [[Kingsparrow Island]] |
||
| + | |Classes Encountered = None |
||
| + | |Enemies = [[City Watch]]<br/>[[Warfare Overseers|Overseers]] |
||
| + | |Runes = 1 |
||
| + | |Charms = 0 |
||
| + | |Shrines = 0 |
||
| + | |Paintings = 0 |
||
| + | |Coins = 187 |
||
| + | |Preceded by = [[The Loyalists]] |
||
| + | |Followed by = |
||
| + | }} |
||
| + | '''The Light at the End''' is the ninth and final mission in ''[[Dishonored]]'', in which [[Corvo Attano]] must confront the leaders of [[the Loyalist Conspiracy]] and rescue [[Emily Kaldwin]] from [[Kingsparrow Island]]. |
||
| + | ==Briefing== |
||
| − | [[File:Kingsparrow1.jpg|thumb|330px|Kingsparrow Fort and the Lighthouse.]] |
||
| ⚫ | ''The leaders of the Loyalist Conspiracy have moved to [[The Lighthouse|a monumental lighthouse]], the final military project devised by the [[Hiram Burrows|Lord Regent]]. They're holding Emily Kaldwin as they struggle to tighten their hold over the city. It's time to confront them, decide their fates, and determine the future of [[Dunwall]].'' |
||
| − | ==Background== |
||
| + | ==Arrival== |
||
| ⚫ | The leaders of the |
||
| + | [[File:0 samuel island.png|thumb|200px|Samuel takes Corvo to the island in high chaos.]] |
||
| − | ==Walkthrough== |
||
| + | Corvo and [[Samuel Beechworth|Samuel]] will make their way to the island. In the [[boat]], Samuel will sum up his feelings about Corvo and how he handled his missions. |
||
| − | [[File:Kingsparrow3.jpg|thumb|Inside the courtyard of Kingsparrow Fort.]] |
||
| + | |||
| ⚫ | |||
| ⚫ | |||
| + | *If Corvo's chaos rating is high, there will be more guards, the weather will be stormy and cloudy, and [[Teague Martin|Martin]] and [[Treavor Pendleton|Pendleton]] will be in the fort rather than the lighthouse. Samuel will condemn Corvo for his brutal actions and fire a gunshot in the air to warn the guards of his presence. |
||
| + | *If Corvo's chaos rating is moderate, it will be categorized as high, but the environment will be slightly different than in true high chaos. Notably, Samuel will not fire his gun, but will say he is disappointed that Corvo "went out of [his] way to be brutal" and will order Corvo out of his boat, saying they will never see each other again. |
||
| + | |||
| + | ==Infiltration== |
||
The area consists of two parts: Kingsparrow Fort and the Lighthouse. |
The area consists of two parts: Kingsparrow Fort and the Lighthouse. |
||
| − | === |
+ | ===Kingsparrow Fort=== |
| + | [[File:Kingsparrow wire method02.png|thumb|200px|Corvo runs along a wire, bypassing security outside the fort.]] |
||
| ⚫ | There are |
||
| + | To reach the fort, Corvo must make his way past several [[City Watch|guards]] and [[Warfare Overseers|Overseers]] with [[Overseer Music Box|music boxes]]. Depending on which route he takes, he may encounter an [[Arc Pylon|arc pylon]] and a [[watchtower]]. |
||
| ⚫ | There are three main entrances to the fort. Each entrance is protected by a [[Wall of Light|wall of light]] that can be deactivated in the Control Room. There is a visible entrance to the sewers located between both gates. This entry point leads to the Control Room and Corvo will be able to deactivate both walls of light from there. There will be at least one guard in the Control Room and multiple guards patrolling outside both entrances. If Corvo has the [[Keys|Control Room Key]], he will be able to access the courtyard through the Control Room. |
||
| + | An additional entrance to the sewers may be found midway up a cliff past the beachside entrance to the fort, allowing access without having to pass through a wall of light. Corvo can swim to and then [[blink]] into the opening without being noticed. |
||
| ⚫ | Once Corvo has entered the fort, he will find himself in |
||
| + | |||
| + | Additionally, Corvo can blink up the rocks attached to large metal cables that are moored into the cliff as support structures. The farther of the two rocks is easier to reach, as it is smaller. Using a combination of Blink and agility, from the water, Corvo can get to the top of the rock to reach the cable. He can then run along these cables, gaining access to the second map within minutes, alerting no guards, and requiring no further action. This path is useful for maintaining low chaos. |
||
| + | |||
| + | [[File:Kingsparrow yard 1.jpg|thumb|200px|Guards patrol the courtyard.]] |
||
| ⚫ | |||
| + | |||
| + | There are five ways into the gatehouse: |
||
*Go straight to the front door, kill the guards and walk into the gatehouse. |
*Go straight to the front door, kill the guards and walk into the gatehouse. |
||
| − | *Enter via the drainage system next to the gatehouse and sneak in from the ground up. |
+ | *Enter via the drainage system next to the gatehouse and sneak in from the ground up. |
*Attempt to scale the gatehouse to gain access via the roof. |
*Attempt to scale the gatehouse to gain access via the roof. |
||
| + | *It is possible to reach the gatehouse without actually crossing the fort. To achieve that, Corvo must jump on the outside wall reinforcements (the parts covered with metal) and then on the sewer exits at the middle of the wall. Repeat until he reaches the point between the fort and the lighthouse. Look up, and there will a spot available to jump inside the gatehouse. |
||
| ⚫ | |||
| + | * Corvo can also reach the gatehouse on the cables wrapped in barbed wire with Blink II. Stand at the edge of the barbed wire, blink as far as possible, quickly jump in the air to get off the barbed wire, and blink again. The barbed wire pushes Corvo back, so if he is not quick enough, it may take more than two blinks to cross. |
||
| ⚫ | |||
| ⚫ | |||
| ⚫ | |||
*Get to the roof of the gatehouse and climb across the thick cables that hold the cable car in place above the gap, then walk along these cables to the other side. |
*Get to the roof of the gatehouse and climb across the thick cables that hold the cable car in place above the gap, then walk along these cables to the other side. |
||
| + | [[File:Bridge to Burrows Lighthouse.png|thumb|200px|The path leading to the lighthouse elevator.]] |
||
| − | The last guard holds the key to the elevator and may be neutralized or pickpocketed |
+ | The last guard holds the key to the elevator and may be neutralized or pickpocketed. The key can also be found in the gatehouse. However the key is not necessary, as Corvo can climb onto elevator's cabin and enter through a hatch on the roof. |
| ⚫ | |||
| ⚫ | |||
| ⚫ | |||
| ⚫ | |||
| ⚫ | |||
| ⚫ | |||
| ⚫ | |||
| ⚫ | |||
| ⚫ | |||
| ⚫ | |||
| ⚫ | Corvo will overhear [[Farley Havelock]] speaking to |
||
| − | *Confront Havelock directly. |
||
| ⚫ | |||
| − | **Attack him immediately, this will cause him to retaliate. |
||
| − | *Sneak up on Havelock and neutralize him, then take the key from the table. |
||
| − | After doing this, Corvo finds Emily behind the locked door in the next room, and the final cutscene plays, with the Outsider informing Corvo of what future his actions have wrought. |
||
| − | == |
+ | ==Confronting Martin (high Chaos only)== |
| + | In high chaos, Martin can first be encountered in the courtyard, trading insults with Pendleton. Once the argument is over, Martin will retire to a room on the highest level of the fort. |
||
| − | As High Overseer Martin and Lord Pendleton are on the island itself, Lord Regent Havelock and Lady Emily are alone in the light tower building. Corvo is greeted by an empty main hall with pools of blood leading up to the roof. There Havelock is on the verge of commiting suicide by plummeting down into the ocean and taking Emily with him down. As Emily is fighting for her life Havelock tells her that he is sure that Corvo is coming for him, but her loved guardian is also that worst of them all and "terrible at saving empresses". When Corvo shows himself Havelock readies to extract revenge in robbing Corvo of Emily's life. |
||
| + | |||
| ⚫ | |||
| + | [[File:0 martin fight.png|thumb|200px|Martin fights Corvo.]] |
||
| − | *If Emily is saved however she will, with Corvo's help, climb the throne in the beginning of what will be known as the age of terror and corruption. |
||
| + | Upon seeing Corvo, he will put his [[pistol]] to his jaw and then explain to the assassin why the Loyalists betrayed him. He reveals that they had good intentions at first, but as they turned to ordering deaths and blackmail, it "became a habit." Martin tells Corvo that having power over an empire "weighs heavily on a man's mind" and then says that Corvo has every right to curse those who betrayed him, but he will not let the assassin kill him. His last words are, "I was born into nothing, and it's nothing I'll return to" before he pulls the trigger, killing himself. |
||
| + | |||
| + | If Corvo chooses to attack Martin before he kills himself, the Overseer will turn hostile and fight back. |
||
| + | |||
| + | ==Confronting Pendleton (high Chaos only)== |
||
| + | Pendleton is located in the gatehouse, where he can be witnessed speaking with his bodyguard, [[Captain Ren]]. Pendleton realizes that the Loyalists have failed and tells Ren that he should have killed them when he had the chance. |
||
| + | |||
| + | Upon Corvo's arrival, Ren will turn hostile, and Corvo must fight him off before speaking to Pendleton. The [[Aristocrats|noble]] can be found on the floor, sitting against a wall. He is wounded and bleeding from a pistol shot, though he does not know who shot him.[[File:0 pendleton.png|thumb|200px|Pendleton dying.]] |
||
| + | |||
| + | Pendleton will then proceed to mock Corvo, offering him [[Coin|money]]—which he does not have, as his family is broke—and then telling Corvo that "everyone knows [he was] screwing the [[Jessamine Kaldwin|Empress]]," and that if he likes noble women, he should meet his cousin Celia. |
||
| + | |||
| + | There is no need for Corvo to kill Pendleton, as he will die from his wounds, but if Corvo decides to kill the noble, his [[Swords|sword]] strike will play in slow motion, but there will be no death animation. |
||
| + | |||
| ⚫ | |||
| ⚫ | |||
| + | [[File:Kingsparrow table 1.jpg|thumb|200px|Pendleton and Martin during the low chaos ending.]] |
||
| ⚫ | Corvo will overhear [[Farley Havelock]] speaking to Martin and Pendleton in a celebratory manner, which gradually turns more reflective and regretful as he continues. There are no guards inside, allowing Corvo to move freely. Upon reaching the penthouse, he discovers that Martin and Pendleton are dead, poisoned by Havelock, who fears that his actions will come back to destroy him. If Corvo has killed none of the assassination targets, Havelock's speech reflects this information, and he laments not being as good a man as Corvo. |
||
| + | |||
| + | Corvo then must deal with Havelock. |
||
| + | |||
| ⚫ | |||
| + | |||
| + | *If Corvo takes the key before Havelock offers it, then Havelock will finish speaking, concluding with, "Kill me or take me to [[Coldridge Prison]]. Whatever you do, [Emily] will be watching." |
||
| + | *Corvo can also attack him immediately, which will cause him to retaliate. Neutralize Havelock, then take the key from the table. |
||
| + | *Corvo can also approach Havelock from behind and dispatch the admiral immediately, allowing Corvo to take the key to Emily's room without interruption. |
||
| + | *Corvo can also use [[Bend Time]] level 2, take the key after Havelock offers it, and then unlock the door to Emily's room without any retaliation from the admiral. |
||
| + | After dealing with Havelock, Corvo finds Emily behind a locked door in the next room. |
||
| + | |||
| + | The final cutscene plays, [[the Outsider]] explaining that with Corvo's help, Emily leads the Empire into a new golden age free of the [[Rat Plague|rat plague]]. She is thereafter known as Emily the Wise. |
||
| + | |||
| ⚫ | |||
| + | [[File:ending havelock emily.png|thumb|200px|Havelock and Emily on the edge of the walkway.]] |
||
| + | Martin and Pendleton are on the island itself, while Havelock and Emily are alone in the lighthouse. Corvo is greeted by an empty main hall with pools of blood leading up to the roof. Havelock stands with Emily on a ledge, struggling with her and shouting about his failed coup. When Corvo approaches, Havelock grabs Emily and stands near the ledge, threatening to jump. As Emily fights for her life, Havelock says that Corvo is the worst of the conspirators and is "terrible at saving Empresses." |
||
| + | |||
| + | Corvo must find a way to neutralize Havelock and save Emily. If he moves too close to Havelock or takes too long to act, the man will jump, taking Emily with him. |
||
| + | |||
| + | [[File:0 emily.png|thumb|200px|Corvo holds Emily's arms as she dangles from the lighthouse.]] |
||
| + | There are many methods Corvo can use to save Emily: |
||
| + | *The easiest method is to blink to the edge of the walkway. Havelock will jump, but Corvo will manage to grab Emily, saving her from falling. |
||
| + | *Hitting Havelock with the crossbow/pistol, Devouring Swarm, or Windblast will cause him to fall, but Emily will manage to break free from his grasp and grab the ledge. Corvo will still have to pull her up. |
||
| + | *Corvo can also [[Possession|possess]] Havelock, walking him away from the edge of the lighthouse. He will then have to fight the Admiral, as Emily cowers in a corner. |
||
| + | *[[Bend Time]] will also give Corvo the ability to grab Emily before Havelock falls. |
||
| + | *An alternate route in the mechanical space before reaching the catwalk will allow Corvo to access a secondary catwalk directly below the main one, then climb up behind Havelock and eliminate him before he has a chance to threaten Emily. |
||
| + | *Alternatively, blinking towards Havelock and Emily before the Admiral notices Corvo will allow Corvo to assassinate Havelock and save Emily without either falling off of the edge. |
||
| + | |||
| + | If Emily is saved, upon speaking with her, she will reveal that she would have executed the Loyalists if Corvo had not killed them. Then, with Corvo's help, she ascends the throne and begins a new age of terror and corruption, leaving her [[Emily Dolls|doll]] on his grave when he dies. |
||
| + | |||
| ⚫ | |||
| + | |||
| + | ==Special Actions== |
||
| + | *Killed Lord Pendleton |
||
| + | *Killed Overseer Martin |
||
| + | *Killed Admiral Havelock |
||
| + | *Read [[Havelock Log|Havelock's Journal]] |
||
| + | *Rescued Emily |
||
| + | |||
| + | ==General Mission Notes== |
||
| + | [[File:0 havelock.png|thumb|200px|Corvo grabs Havelock's arm.]] |
||
| + | *In low chaos, if Corvo takes the key and unlocks the door to Emily's room without alerting Havelock, the mission will be completed successfully. |
||
| + | *In low chaos, if Corvo possesses Havelock and attempts to open the door, Emily will call out for help, but the door will remain barred. |
||
| + | *In high chaos, if Corvo wishes to approach Havelock stealthily, he can remove the tank of whale oil in the room immediately before the ledge with Havelock and Emily on it. This will allow him to access a passage underneath the ledge, followed by a cable leading up to a small platform behind Havelock. |
||
| + | *In high chaos, Corvo can ignore both Martin and Pendleton and still complete the mission. However, Corvo must neutralize Havelock or kill him. |
||
==Trivia== |
==Trivia== |
||
| ⚫ | |||
| ⚫ | |||
| + | *If Corvo kills Samuel on Kingsparrow Island, the ending sequence will show Corvo standing over his grave, paying his respects. |
||
| ⚫ | |||
| + | *If Sokolov and Piero are killed during a low chaos playthrough, the ending will show their abandoned laboratory being overrun by the plague, though the Outsider's narration still states that the plague is cured. |
||
| − | **If Corvo's chaos rating is high, there will be more guards, the weather will be stormy and cloudy, and Samuel will show his contempt towards Corvo. If you have been extremely violent in your playthrough, Samuel will even fire a gunshot to warn the guards on the isle. High chaos will also put Martin and Pendleton out of the lighthouse. As stated by Samuel, they started fighting among themselves once they arrived at the island. This allows Corvo to personally kill them himself and the hole blown also provides another easy entrance. |
||
| + | *If the low chaos version of the mission loads, the good ending will show, even if Corvo kills enough guards to achieve high chaos in the mission stats. |
||
| ⚫ | |||
| + | *If Corvo takes the key from the table in low chaos and then approaches Havelock, the admiral will point to the table and talk about the key, even though it is gone. |
||
| − | *(Low chaos) If you possess Havelock and attempt to open the door, you will hear Emily calling out for help but it will say door bared from other side. Clicking on the door will show text saying you must remove threats before opening. |
||
| − | * |
+ | *Guards around the island can be heard talking about Emily, including how she feels and who has seen her. |
| + | *In High Chaos, it is still possible to render both Martin and Havelock unconscious without killing them, though Emily's end lines and the final cutscene will not change. |
||
| + | *Oddly, the Watch Officers in this level sometimes will have the same voices as a Watch Lower Guard or City Watch Guard. |
||
| + | *Collecting [[coin]]s in this mission serves no purpose other than for the sake of completion since ammunition and [[Upgrades|upgrades]] can no longer be purchased at this point in the game. |
||
| + | *This is the only mission to not have unique [[The Heart|Heart]] lines, rather it shares the lines of the [[The Loyalists|previous mission]]. |
||
| + | *In the high chaos version of this mission, you have to either kill or neutralize Havelock, despite only being an optional objective. |
||
| + | *In high chaos, at the final confrontation with Havelock and Emily, if possession is used on Havelock and he is walked down to the lower platform, he will fall unconscious once it ends. This most likely occurs due to a glitch. |
||
| + | ==Audio== |
||
| ⚫ | |||
| + | {| class="article-table" border="1" cellpadding="1" cellspacing="1" style="width: 400px; margin: auto;" |
||
| − | <gallery widths="200" captionalign="center" spacing="small" hideaddbutton="true" position="center"> |
||
| + | |- |
||
| − | File:Dishonored - High Chaos Walkthrough - Mission 9 The Light at the End pt 1|Part 1 |
||
| + | ! scope="col" style="text-align: center;" |''Description'' |
||
| ⚫ | |||
| + | ! scope="col" style="text-align: center;" |''Audio'' |
||
| + | |- |
||
| + | | style="text-align: center;" |Havelock's final monologue in Low Chaos. |
||
| + | | style="text-align: center; line-height:20px;" |[[File:Havelock's Final Monologue -Low Chaos-.ogg]] |
||
| + | |} |
||
| + | ==Gallery== |
||
| + | |||
| + | <div class="scrollbox"> |
||
| + | <gallery position="center" captionalign="center"> |
||
| + | Kingsparrow high chaos.jpg|Kingsparrow Island in high chaos. |
||
| + | Samuel Kingsparrow Island Low Chaos.png|Samuel brings Corvo to Kingsparrow Island in low chaos. |
||
| + | Samuelkingsparrow.png|Samuel drops Corvo off at Kingsparrow Island in low chaos. |
||
| + | Kingsparrow island daytime.png|The island in low chaos. |
||
| + | Kingsparrow fort 1.jpg|The fort. |
||
| + | Watchtowerkingsparrow.png|Searchlight at Kingsparrow Fort. |
||
| + | kingsparrow day.png|Wire method. |
||
| + | kingsparrow wire method01.png|Corvo stands on top of a rock attached to a cable. |
||
| + | kingsparrow wire method03.png|Corvo looks down at one of the entrances to the fort as he runs along a cable. |
||
| + | pile o guards.png|A pile of melted City Watch Officers. |
||
| + | pendleton gatehouse hole.png|Pendleton in the gatehouse. |
||
| + | martingun.png|Martin aiming at Pendleton. |
||
| + | Martin shoots at Pendleton.png|Martin fires his gun at Pendleton, and misses. |
||
| + | Teague Martin, light at the end.png|Martin before killing himself. |
||
| + | 0 martin death.png|Martin's death animation. |
||
| + | 0 gatehouse.png|The hole in the gatehouse. |
||
| + | ren and pendleton 1.jpeg|Pendleton with Captain Ren. |
||
| + | 0 ren5.png|Corvo fights Captain Ren. |
||
| + | Island stairs.png|Stairs leading to the elevator. |
||
| + | Kingsparrow elevator 1.jpg|The elevator. |
||
| + | screens05 pendleton.png|Pendleton, poisoned. |
||
| + | screens05 martin.png|Martin, after being poisoned. |
||
| + | screens05 havelock.png|Havelock speaks to his dead companions. |
||
| + | Havelock.jpg|Havelock during the low chaos ending. |
||
| + | emily room lighthouse.png|Emily's room in the lighthouse. |
||
| + | Havelock and Emily.png|Havelock holds Emily on the ledge of the walkway outside the lighthouse. |
||
| + | 0 havelock emily.png|Havelock and Emily at the end of the walkway. |
||
| + | 0 havelock emily2.png|Havelock holds onto Emily as he falls from the lighthouse. |
||
| + | Admiral Havelock.jpg|Corvo killing Havelock. |
||
| + | screens05 map2.png|A map of the lower part of Gristol and most of Serkonos hanging on a wall in the lighthouse. |
||
| + | Aristocrats Knife.png|An aristocrat holds a knife behind his back during the low chaos ending. |
||
| + | Corvoandemilygoodending.png|Corvo and Emily during the low chaos ending. |
||
| + | CorvoSamuellowchaosHoundPitscelebration.jpg|Corvo and Samuel celebrate in the low chaos ending. |
||
| + | callista cecelia ending.jpg|Callista and Cecelia alongside survivors in the low chaos ending. |
||
| + | Curnows Reunion.png|Callista reunites with her Uncle Curnow. |
||
| + | Pierosokolovcure.jpg|Piero and Sokolov work on a cure for the plague. |
||
| + | 0 em corvo grave.png|Emily leaves her doll on Corvo's grave. |
||
| + | 0 em doll grave.png|Corvo's grave with Emily's doll. |
||
| + | 0 aristocrats2.png|Aristocrats argue in the high chaos ending. |
||
| + | 0 emily throne.png|Corvo fights off an aristocrat near the throne during the high chaos ending. |
||
| + | ending aristocrats02.png|Aristocrats arguing during the high chaos ending after Emily dies. |
||
| + | ending aristocrats05.png|The City Watch fights aristocrats after Emily dies in the high chaos ending. |
||
| + | ending aristocrats01.png|A City Watch Officer pulls an aristocrat away from the empty throne in the Void. |
||
| + | Party3.png|A thug and a courtesan in the high chaos ending. |
||
| + | ending looting01.png|A thug loots an aristocrat in the high chaos ending. |
||
| + | ending rats03.png|Rats attack a survivor during the high chaos ending. |
||
| + | Callista rat attack.png|Callista is attacked by rats in the high chaos ending. |
||
| + | Low chaos, abandoned lab.jpg|Piero and Sokolov's abandoned lab. |
||
| + | Corvosam'sgrave.png|Corvo visits Samuel's grave if he is killed during the mission. |
||
| + | SamuelBeechworthhighchaos.png|Samuel faces rough seas during the high chaos ending. |
||
| + | ending tallboys04.png|Tallboys attack survivors in the high chaos ending. |
||
| + | Emgrave01.png|Emily Kaldwin's grave. |
||
| + | Kingsparrow map.png|Map of Kingsparrow Island. |
||
| ⚫ | |||
| + | </div> |
||
{{Navbox Missions}} |
{{Navbox Missions}} |
||
| + | |||
| ⚫ | |||
| + | [[ru:Путеводный маяк]] |
||
| + | [[pl:Światło na końcu]] |
||
| + | [[fr:La lumière au bout du tunnel]] |
||
| + | [[it:La Luce, Infine]] |
||
| + | [[zh:最后的灯塔]] |
||
| + | |||
| + | {{DEFAULTSORT:Light at the End, The}} |
||
| ⚫ | |||
Revision as of 18:45, 7 August 2019
|
Spoiler warning!
This article contains plot spoilers. If you do not yet know of this information, it is recommended that you read at your own risk or not at all. |
The Light at the End is the ninth and final mission in Dishonored, in which Corvo Attano must confront the leaders of the Loyalist Conspiracy and rescue Emily Kaldwin from Kingsparrow Island.
Briefing
The leaders of the Loyalist Conspiracy have moved to a monumental lighthouse, the final military project devised by the Lord Regent. They're holding Emily Kaldwin as they struggle to tighten their hold over the city. It's time to confront them, decide their fates, and determine the future of Dunwall.
Arrival
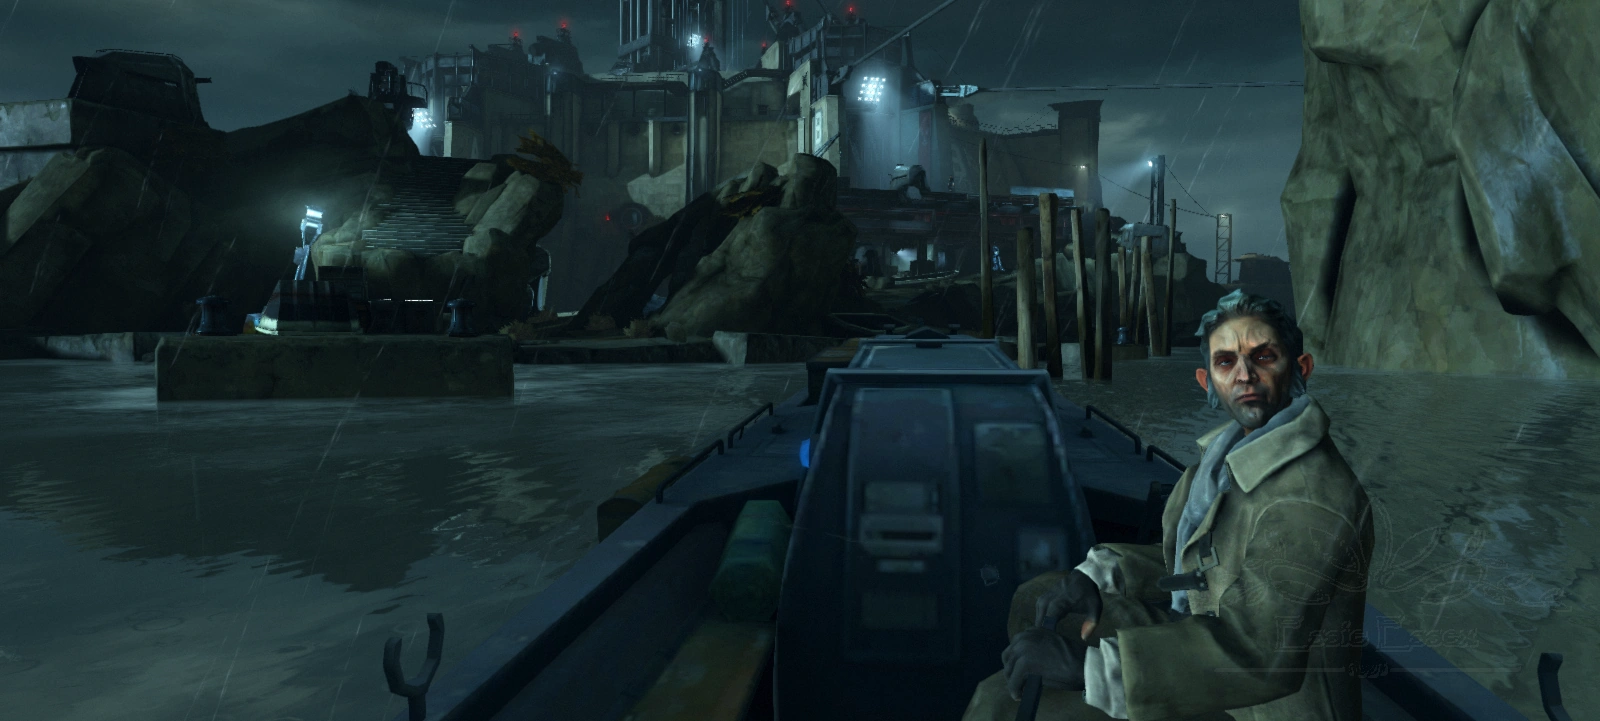
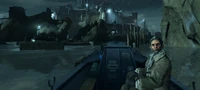
Samuel takes Corvo to the island in high chaos.
Corvo and Samuel will make their way to the island. In the boat, Samuel will sum up his feelings about Corvo and how he handled his missions.
The condition of the island will depend on Corvo's chaos rating.
- If Corvo's chaos rating is low, there will be fewer guards, the weather will be sunny, and Samuel will be very respectful and friendly towards Corvo.
- If Corvo's chaos rating is high, there will be more guards, the weather will be stormy and cloudy, and Martin and Pendleton will be in the fort rather than the lighthouse. Samuel will condemn Corvo for his brutal actions and fire a gunshot in the air to warn the guards of his presence.
- If Corvo's chaos rating is moderate, it will be categorized as high, but the environment will be slightly different than in true high chaos. Notably, Samuel will not fire his gun, but will say he is disappointed that Corvo "went out of [his] way to be brutal" and will order Corvo out of his boat, saying they will never see each other again.
Infiltration
The area consists of two parts: Kingsparrow Fort and the Lighthouse.
Kingsparrow Fort

Corvo runs along a wire, bypassing security outside the fort.
To reach the fort, Corvo must make his way past several guards and Overseers with music boxes. Depending on which route he takes, he may encounter an arc pylon and a watchtower. There are three main entrances to the fort. Each entrance is protected by a wall of light that can be deactivated in the Control Room. There is a visible entrance to the sewers located between both gates. This entry point leads to the Control Room and Corvo will be able to deactivate both walls of light from there. There will be at least one guard in the Control Room and multiple guards patrolling outside both entrances. If Corvo has the Control Room Key, he will be able to access the courtyard through the Control Room.
An additional entrance to the sewers may be found midway up a cliff past the beachside entrance to the fort, allowing access without having to pass through a wall of light. Corvo can swim to and then blink into the opening without being noticed.
Additionally, Corvo can blink up the rocks attached to large metal cables that are moored into the cliff as support structures. The farther of the two rocks is easier to reach, as it is smaller. Using a combination of Blink and agility, from the water, Corvo can get to the top of the rock to reach the cable. He can then run along these cables, gaining access to the second map within minutes, alerting no guards, and requiring no further action. This path is useful for maintaining low chaos.
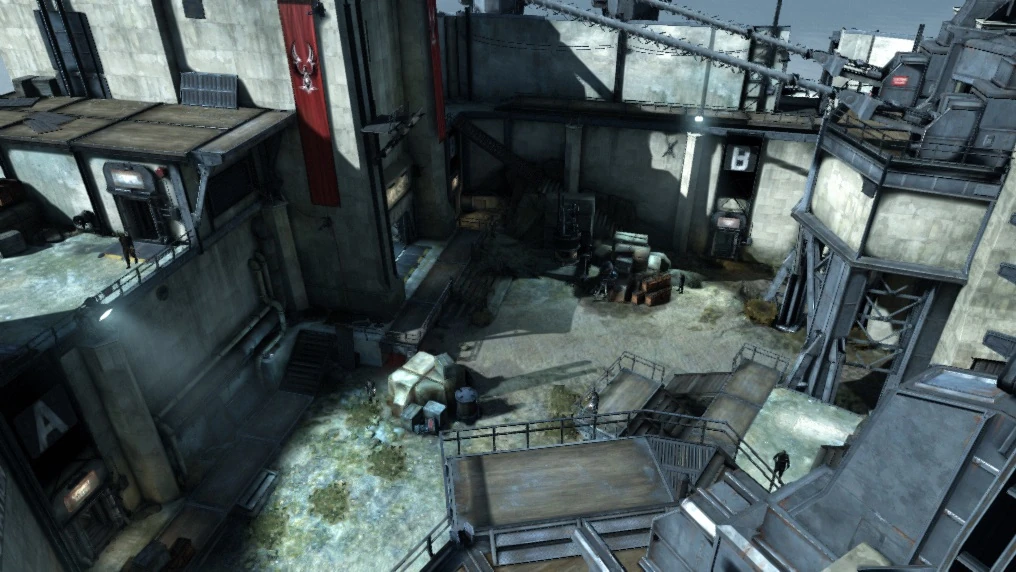
Guards patrol the courtyard.
Once Corvo has entered the fort, he will find himself in a courtyard. Multiple guards will be patrolling the area and guarding the entrance to the Lighthouse's elevator. Corvo must move through the courtyard to the gatehouse using stealth or violence.
There are five ways into the gatehouse:
- Go straight to the front door, kill the guards and walk into the gatehouse.
- Enter via the drainage system next to the gatehouse and sneak in from the ground up.
- Attempt to scale the gatehouse to gain access via the roof.
- It is possible to reach the gatehouse without actually crossing the fort. To achieve that, Corvo must jump on the outside wall reinforcements (the parts covered with metal) and then on the sewer exits at the middle of the wall. Repeat until he reaches the point between the fort and the lighthouse. Look up, and there will a spot available to jump inside the gatehouse.
- Corvo can also reach the gatehouse on the cables wrapped in barbed wire with Blink II. Stand at the edge of the barbed wire, blink as far as possible, quickly jump in the air to get off the barbed wire, and blink again. The barbed wire pushes Corvo back, so if he is not quick enough, it may take more than two blinks to cross.
Once in the gatehouse, there is a large gap before the lighthouse. From here there are two ways to proceed:
- Blink to the cable car which is in the middle of the gap, deal with the guard and arc pylon, and then blink across to the other side.
- Get to the roof of the gatehouse and climb across the thick cables that hold the cable car in place above the gap, then walk along these cables to the other side.
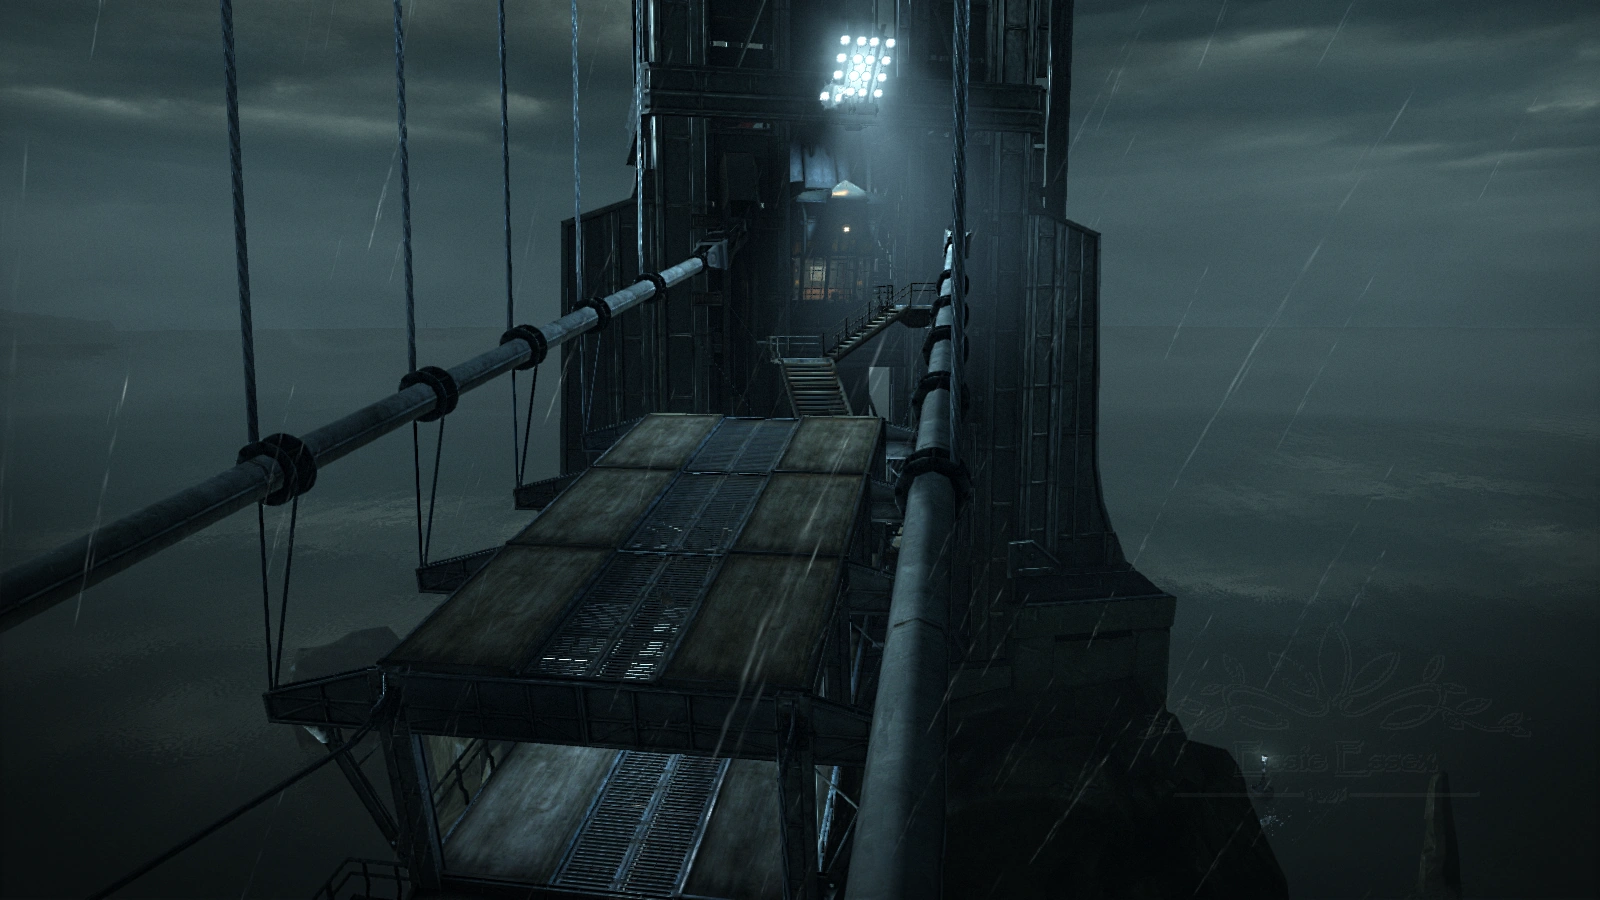
The path leading to the lighthouse elevator.
The last guard holds the key to the elevator and may be neutralized or pickpocketed. The key can also be found in the gatehouse. However the key is not necessary, as Corvo can climb onto elevator's cabin and enter through a hatch on the roof.
The Lighthouse
Corvo will arrive at the top level of the lighthouse, with several guards patrolling the area outside. Corvo's assassination target can be found in the interior of the lighthouse. Corvo can either:
- Take the route outside the lighthouse and deal with the guards, then walk in and confront the target.
- Use Blink and Agility to climb to the roof of the lighthouse and then sneak inside through the backdoor.
Confronting Martin (high Chaos only)
In high chaos, Martin can first be encountered in the courtyard, trading insults with Pendleton. Once the argument is over, Martin will retire to a room on the highest level of the fort.
Martin fights Corvo.
Upon seeing Corvo, he will put his pistol to his jaw and then explain to the assassin why the Loyalists betrayed him. He reveals that they had good intentions at first, but as they turned to ordering deaths and blackmail, it "became a habit." Martin tells Corvo that having power over an empire "weighs heavily on a man's mind" and then says that Corvo has every right to curse those who betrayed him, but he will not let the assassin kill him. His last words are, "I was born into nothing, and it's nothing I'll return to" before he pulls the trigger, killing himself.
If Corvo chooses to attack Martin before he kills himself, the Overseer will turn hostile and fight back.
Confronting Pendleton (high Chaos only)
Pendleton is located in the gatehouse, where he can be witnessed speaking with his bodyguard, Captain Ren. Pendleton realizes that the Loyalists have failed and tells Ren that he should have killed them when he had the chance.
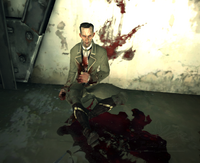
Upon Corvo's arrival, Ren will turn hostile, and Corvo must fight him off before speaking to Pendleton. The noble can be found on the floor, sitting against a wall. He is wounded and bleeding from a pistol shot, though he does not know who shot him.

Pendleton dying.
Pendleton will then proceed to mock Corvo, offering him money—which he does not have, as his family is broke—and then telling Corvo that "everyone knows [he was] screwing the Empress," and that if he likes noble women, he should meet his cousin Celia.
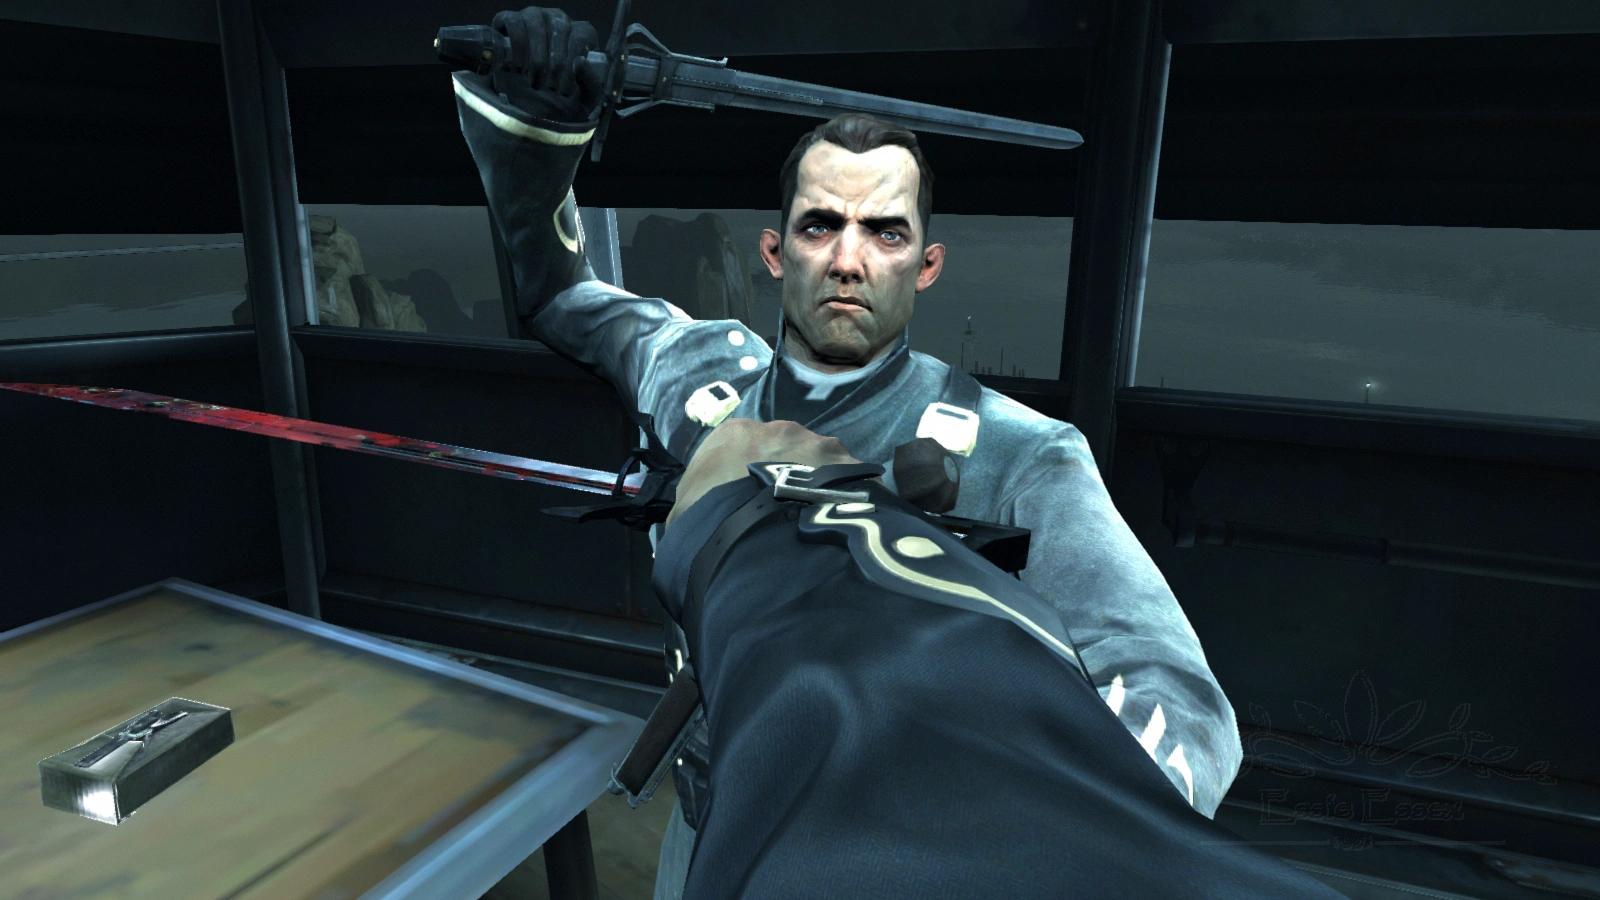
There is no need for Corvo to kill Pendleton, as he will die from his wounds, but if Corvo decides to kill the noble, his sword strike will play in slow motion, but there will be no death animation.
The Final Confrontation
Low Chaos
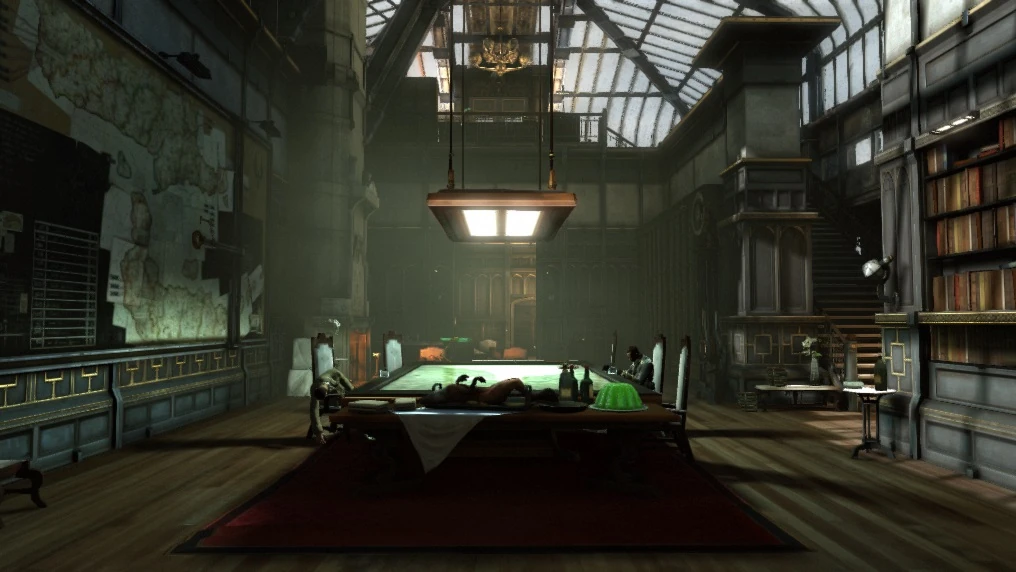
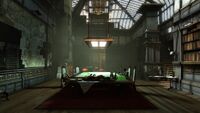
Pendleton and Martin during the low chaos ending.
Corvo will overhear Farley Havelock speaking to Martin and Pendleton in a celebratory manner, which gradually turns more reflective and regretful as he continues. There are no guards inside, allowing Corvo to move freely. Upon reaching the penthouse, he discovers that Martin and Pendleton are dead, poisoned by Havelock, who fears that his actions will come back to destroy him. If Corvo has killed none of the assassination targets, Havelock's speech reflects this information, and he laments not being as good a man as Corvo.
Corvo then must deal with Havelock.
- Havelock will present Corvo with the key to Emily's room on the table near where he is standing; Corvo will be forced to fight Havelock if he takes the key.
- If Corvo takes the key before Havelock offers it, then Havelock will finish speaking, concluding with, "Kill me or take me to Coldridge Prison. Whatever you do, [Emily] will be watching."
- Corvo can also attack him immediately, which will cause him to retaliate. Neutralize Havelock, then take the key from the table.
- Corvo can also approach Havelock from behind and dispatch the admiral immediately, allowing Corvo to take the key to Emily's room without interruption.
- Corvo can also use Bend Time level 2, take the key after Havelock offers it, and then unlock the door to Emily's room without any retaliation from the admiral.
After dealing with Havelock, Corvo finds Emily behind a locked door in the next room.
The final cutscene plays, the Outsider explaining that with Corvo's help, Emily leads the Empire into a new golden age free of the rat plague. She is thereafter known as Emily the Wise.
High Chaos

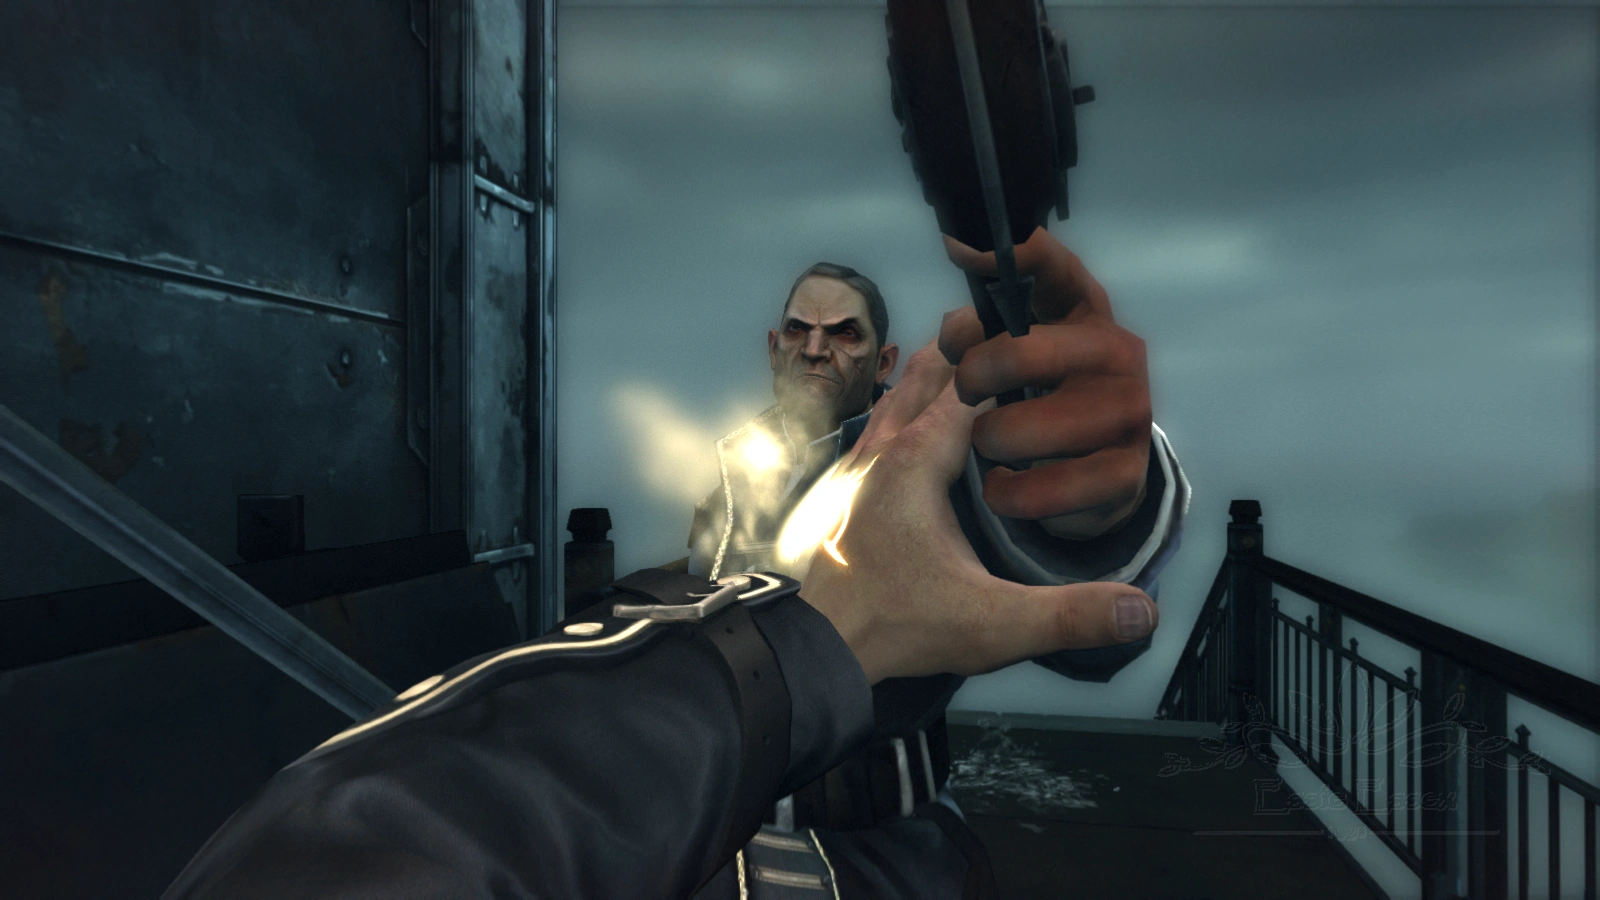
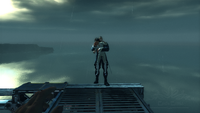
Havelock and Emily on the edge of the walkway.
Martin and Pendleton are on the island itself, while Havelock and Emily are alone in the lighthouse. Corvo is greeted by an empty main hall with pools of blood leading up to the roof. Havelock stands with Emily on a ledge, struggling with her and shouting about his failed coup. When Corvo approaches, Havelock grabs Emily and stands near the ledge, threatening to jump. As Emily fights for her life, Havelock says that Corvo is the worst of the conspirators and is "terrible at saving Empresses."
Corvo must find a way to neutralize Havelock and save Emily. If he moves too close to Havelock or takes too long to act, the man will jump, taking Emily with him.
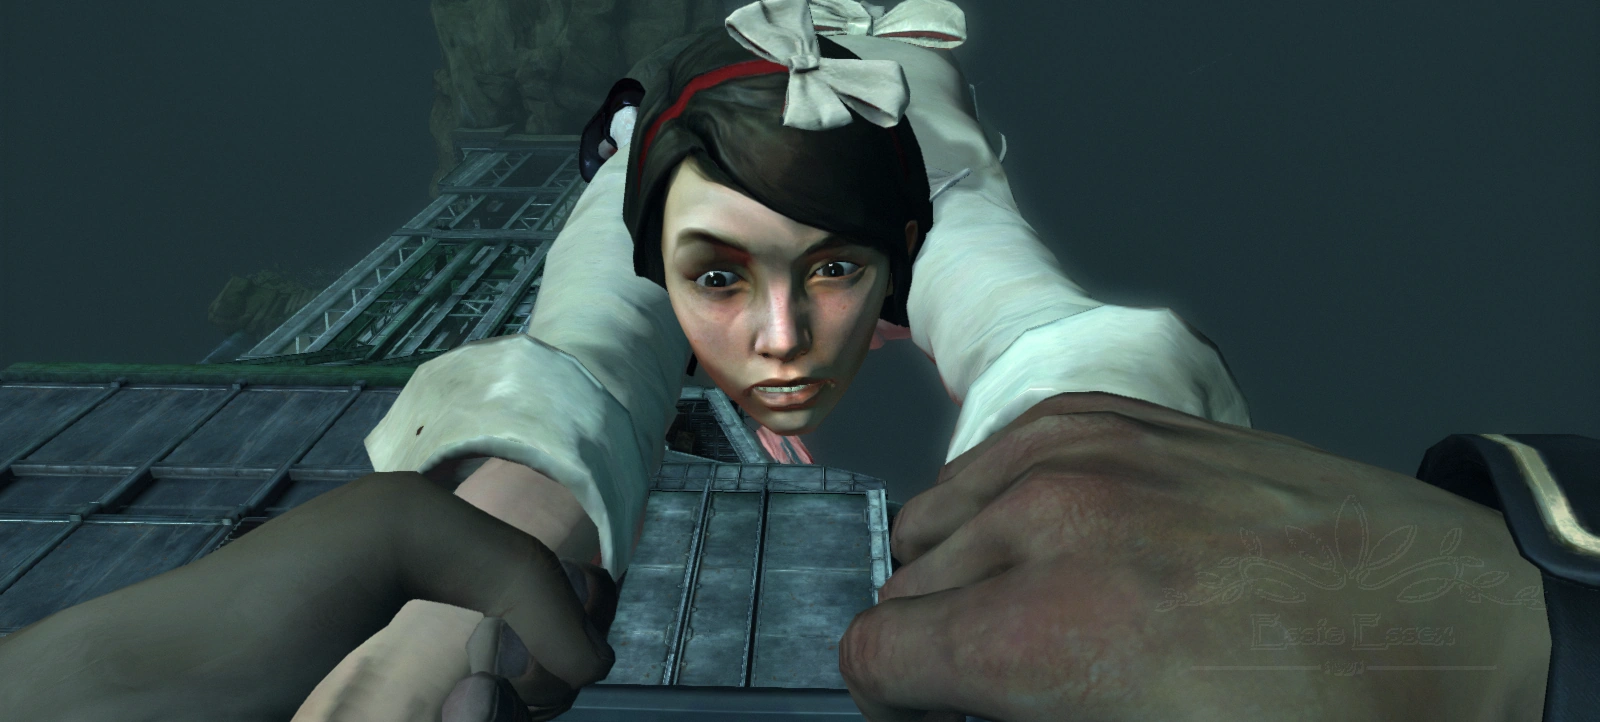
Corvo holds Emily's arms as she dangles from the lighthouse.
There are many methods Corvo can use to save Emily:
- The easiest method is to blink to the edge of the walkway. Havelock will jump, but Corvo will manage to grab Emily, saving her from falling.
- Hitting Havelock with the crossbow/pistol, Devouring Swarm, or Windblast will cause him to fall, but Emily will manage to break free from his grasp and grab the ledge. Corvo will still have to pull her up.
- Corvo can also possess Havelock, walking him away from the edge of the lighthouse. He will then have to fight the Admiral, as Emily cowers in a corner.
- Bend Time will also give Corvo the ability to grab Emily before Havelock falls.
- An alternate route in the mechanical space before reaching the catwalk will allow Corvo to access a secondary catwalk directly below the main one, then climb up behind Havelock and eliminate him before he has a chance to threaten Emily.
- Alternatively, blinking towards Havelock and Emily before the Admiral notices Corvo will allow Corvo to assassinate Havelock and save Emily without either falling off of the edge.
If Emily is saved, upon speaking with her, she will reveal that she would have executed the Loyalists if Corvo had not killed them. Then, with Corvo's help, she ascends the throne and begins a new age of terror and corruption, leaving her doll on his grave when he dies.
Should Corvo not save Emily, the end scene will show the Empire in total despair, decimated by the rat plague. Corvo leaves his mask and blade on Emily's grave and sails away on an outbound ship.
Special Actions
- Killed Lord Pendleton
- Killed Overseer Martin
- Killed Admiral Havelock
- Read Havelock's Journal
- Rescued Emily
General Mission Notes
Corvo grabs Havelock's arm.
- In low chaos, if Corvo takes the key and unlocks the door to Emily's room without alerting Havelock, the mission will be completed successfully.
- In low chaos, if Corvo possesses Havelock and attempts to open the door, Emily will call out for help, but the door will remain barred.
- In high chaos, if Corvo wishes to approach Havelock stealthily, he can remove the tank of whale oil in the room immediately before the ledge with Havelock and Emily on it. This will allow him to access a passage underneath the ledge, followed by a cable leading up to a small platform behind Havelock.
- In high chaos, Corvo can ignore both Martin and Pendleton and still complete the mission. However, Corvo must neutralize Havelock or kill him.
Trivia
- Inside the lighthouse, Corvo can find the final chapter of Havelock's log, detailing his feelings about the situation that he has put himself in.
- If Corvo kills Samuel on Kingsparrow Island, the ending sequence will show Corvo standing over his grave, paying his respects.
- If Sokolov and Piero are killed during a low chaos playthrough, the ending will show their abandoned laboratory being overrun by the plague, though the Outsider's narration still states that the plague is cured.
- If the low chaos version of the mission loads, the good ending will show, even if Corvo kills enough guards to achieve high chaos in the mission stats.
- If Corvo takes the key from the table in low chaos and then approaches Havelock, the admiral will point to the table and talk about the key, even though it is gone.
- Guards around the island can be heard talking about Emily, including how she feels and who has seen her.
- In High Chaos, it is still possible to render both Martin and Havelock unconscious without killing them, though Emily's end lines and the final cutscene will not change.
- Oddly, the Watch Officers in this level sometimes will have the same voices as a Watch Lower Guard or City Watch Guard.
- Collecting coins in this mission serves no purpose other than for the sake of completion since ammunition and upgrades can no longer be purchased at this point in the game.
- This is the only mission to not have unique Heart lines, rather it shares the lines of the previous mission.
- In the high chaos version of this mission, you have to either kill or neutralize Havelock, despite only being an optional objective.
- In high chaos, at the final confrontation with Havelock and Emily, if possession is used on Havelock and he is walked down to the lower platform, he will fall unconscious once it ends. This most likely occurs due to a glitch.
Audio
| Description | Audio |
|---|---|
| Havelock's final monologue in Low Chaos. |
Gallery
")
")
")
")
")
")
")
")
")
")
")
")
")
")
")
")
")
")
")
")
")
")
")
")
")
")
")
")
")
")
")
")
")
")
")
")
")
")
")
")
")
")
")
")
")
")
")
")
")
")
")
")
")
Missions in Dishonored | |
|---|---|
| Main Campaign |
Returning Home • Dishonored • High Overseer Campbell • House of Pleasure • The Royal Physician • Lady Boyle's Last Party • Return to the Tower • The Flooded District • The Loyalists • The Light at the End |
| The Knife of Dunwall |
None Like Her • A Captain of Industry • Eminent Domain • The Surge |
| The Brigmore Witches |
Choosing Your Mark • A Stay of Execution for Lizzy • The Dead Eels • Delilah's Masterwork |