No edit summary Tag: sourceedit |
(These Walkthroughs are defunct) |
||
| (46 intermediate revisions by 16 users not shown) | |||
| Line 2: | Line 2: | ||
{{Mission |
{{Mission |
||
|name = Dishonored |
|name = Dishonored |
||
| − | |image = |
+ | |image = Coldridge hallway.jpg |
|Target = None |
|Target = None |
||
|Location = [[Coldridge Prison]]<br>[[Dunwall Sewers]] |
|Location = [[Coldridge Prison]]<br>[[Dunwall Sewers]] |
||
|Classes Encountered = [[City Watch]]<br>[[Bottle Street Gang]] |
|Classes Encountered = [[City Watch]]<br>[[Bottle Street Gang]] |
||
| − | |Enemies = [[Watch Lower Guards]]<br>[[City Watch Guards]] |
+ | |Enemies = [[Watch Lower Guards]]<br>[[City Watch Guards]]<br>[[City Watch Officers]] |
|Runes = 0 |
|Runes = 0 |
||
|Charms = 0 |
|Charms = 0 |
||
| Line 12: | Line 12: | ||
|Paintings = 0 |
|Paintings = 0 |
||
|Coins = 1010 |
|Coins = 1010 |
||
| + | |Preceded by = [[Returning Home]] |
||
| + | |Followed by = [[High Overseer Campbell]] |
||
}} |
}} |
||
| + | {{SameName|the mission|the video game ''[[Dishonored]]''}} |
||
| − | '''Dishonored''' is the first mission of |
+ | '''Dishonored''' is the first mission of ''[[Dishonored]]'', in which [[Corvo Attano]] must escape from the confines of [[Coldridge Prison]] and meet [[Samuel Beechworth]] by the [[Wrenhaven River]]. |
==Briefing== |
==Briefing== |
||
| + | ===Mission=== |
||
| − | ''Six months have passed since you were accused by the [[Hiram Burrows|Royal Spymaster]] of murdering the [[Jessamine Kaldwin|Empress]] and conspiring to abduct her daughter [[Emily Kaldwin|Emily]], the royal heir. Now, locked away in |
+ | ''Six months have passed since you were accused by the [[Hiram Burrows|Royal Spymaster]] of murdering the [[Jessamine Kaldwin|Empress]] and conspiring to abduct her daughter [[Emily Kaldwin|Emily]], the royal heir. Now, locked away in Coldridge Prison, the time of your execution draws near.'' |
| + | |||
| + | ===Mid-mission, Fugitive=== |
||
| + | ''You have escaped Coldridge Prison with the help of hidden allies. If you can reach the Wrenhaven River, they promise to aid you in your next move.'' |
||
==Mission Details== |
==Mission Details== |
||
===At Coldridge Prison=== |
===At Coldridge Prison=== |
||
[[File:Coldridgefromafriend.jpg|thumb|200px|The guard at Corvo's cell.]] |
[[File:Coldridgefromafriend.jpg|thumb|200px|The guard at Corvo's cell.]] |
||
| − | On the eve of |
+ | On the eve of Corvo's execution, [[Watch Officer Thorpe]] will deliver a tray of [[food]] to his cell and urge him to eat, saying the meal "comes from a friend." Hidden underneath the bread on the tray is an [[Anonymous Message|anonymous message]] and the [[Keys|key]] to Corvo's cell. |
| − | He will then use the key to unlock his cell, and directly outside is a table with a [[Swords|sword]] on it. There are three guards patrolling the corridor ahead. The first can be eliminated and his body hidden while the latter two are conversing, but the others will require Corvo to wait until they have finished their conversation for him to dispatch them without being noticed. |
+ | He will then use the key to unlock his cell, and directly outside is a table with a [[Swords|sword]] on it. There are three [[City Watch Guards|guards]] patrolling the corridor ahead. The first can be eliminated and his body hidden while the latter two are conversing, but the others will require Corvo to wait until they have finished their conversation for him to dispatch them without being noticed. |
| − | There is a bridge over the corridor that leads to the yard walkway, which can be accessed by either climbing or taking the stairs. Upon climbing, a [[ |
+ | There is a bridge over the corridor that leads to the yard walkway, which can be accessed by either climbing or taking the stairs. Upon climbing, a [[pistol]] can be looted from a weapons rack, along with some food and [[coin]]. |
| − | [[File: |
+ | [[File:Clockwork Explosive.png|right|125px|Clockwork Bomb]] |
| − | The door at the end of the bridge will be locked, and Corvo must pickpocket a guard to procure the key. That done, the walkway leads to a room with another guard and two doors after it: the [[interrogation room]] and the courtyard. The latter will be locked for the time being, until the current objective is completed. To accomplish this, Corvo must enter the interrogation room to fetch the clockwork explosive, which is contained within the safe at the back of the room. |
+ | The door at the end of the bridge will be locked, and Corvo must pickpocket a guard to procure the key. That done, the walkway leads to a room with another guard and two doors after it: the [[Interrogation Room#Coldridge Prison|interrogation room]] and the courtyard. The latter will be locked for the time being, until the current objective is completed. To accomplish this, Corvo must enter the interrogation room to fetch the clockwork explosive, which is contained within the safe at the back of the room. |
[[File:Hackworth6.png|thumb|200px|left|Guards conversing in the prison yard.]] |
[[File:Hackworth6.png|thumb|200px|left|Guards conversing in the prison yard.]] |
||
| − | After fetching the explosive, Corvo will witness one of the City Watch guards entering the yard, where he will begin a conversation with a [[Watch Lower Guards|Lower Guard]] named [[Hackworth]]. Corvo can sneak around them by hiding behind the different obstacles in the room, or by picking each off while the other cannot see. From this point, he can take the stairs at the other end of the yard, which lead to the prison's control room. |
+ | After fetching the explosive, Corvo will witness one of the [[City Watch]] guards entering the yard, where he will begin a conversation with a [[Watch Lower Guards|Lower Guard]] named [[Hackworth]]. Corvo can sneak around them by hiding behind the different obstacles in the room, or by picking each off while the other cannot see. From this point, he can take the stairs at the other end of the yard, which lead to the prison's control room. |
In the control room, there will be two options available to Corvo. He can either dispatch the guards in the room and pull the lever to open the door, or he can climb onto some pipes opposite the offices and traverse into the next room. If a body is previously placed in front of Corvo's cell, it may attract the guards' attention and lure them away. |
In the control room, there will be two options available to Corvo. He can either dispatch the guards in the room and pull the lever to open the door, or he can climb onto some pipes opposite the offices and traverse into the next room. If a body is previously placed in front of Corvo's cell, it may attract the guards' attention and lure them away. |
||
| Line 39: | Line 46: | ||
Corvo will need to dispatch the two guards in the room, and can then plant the explosives on the door to escape. If Corvo chose to open the door to enter the room, he can use the lever in this room to close it behind him; this will hinder any guards left in the facility from entering following the explosion, giving Corvo more time to escape or hide. |
Corvo will need to dispatch the two guards in the room, and can then plant the explosives on the door to escape. If Corvo chose to open the door to enter the room, he can use the lever in this room to close it behind him; this will hinder any guards left in the facility from entering following the explosion, giving Corvo more time to escape or hide. |
||
| − | ([[Clean Hands]] note: There is a dumpster next to the outer door, and if an unconscious guard is placed in it, the explosion will kill him, locking the Clean Hands [[Dishonored Achievements|achievement/trophy]]. An effective hiding place is the open |
+ | ([[Clean Hands]] note: There is a dumpster next to the outer door, and if an unconscious guard is placed in it, the explosion will kill him, locking the Clean Hands [[Dishonored Achievements|achievement/trophy]]. An effective hiding place is the open [[Wolfhounds|wolfhound]] cage, to the left of the gate when Corvo first enters.) |
| + | |||
| + | ([[Chaos#High Chaos|High Chaos]] note: After blowing up the door, guards will spawn and enter the room, searching for Corvo. As guards are killed, new ones will spawn. There is no limit to the number of guards that can respawn at this point. Corvo can hide deep in the storage container to the left of the door, on the side closest to the wall, shielding himself from most attacks. From here he can attack the guards between their attacks.) |
||
When the door to the prison's forecourt is destroyed, Corvo must dive into the water and swim to the [[Dunwall Sewers|sewers']] entrance. |
When the door to the prison's forecourt is destroyed, Corvo must dive into the water and swim to the [[Dunwall Sewers|sewers']] entrance. |
||
| Line 47: | Line 56: | ||
===Dunwall Sewers=== |
===Dunwall Sewers=== |
||
[[File:Dunwallsewerscell.jpg|thumb|200px|The cell and note.]] |
[[File:Dunwallsewerscell.jpg|thumb|200px|The cell and note.]] |
||
| − | Shortly after entering the sewers, there will be [[Note From A Friend| |
+ | Shortly after entering the sewers, there will be a [[Note From A Friend|note]], as well as a locked gate to a cell blocking the path. Corvo will need to climb the cell and crawl through the small space overhead. A swarm of [[rats]] will convene below, and two guards on the other side of another cell door can be heard talking about Corvo. As Corvo approaches the door, the guards will open it and will be attacked and consumed by the rats. |
| − | Corvo can then descend from the top of the cell and dive into the water nearby. On swimming through the sewer outlet, there will be a dead couple curled together if Corvo turns back, with [[Damien's Journal| |
+ | Corvo can then descend from the top of the cell and dive into the water nearby. On swimming through the sewer outlet, there will be a dead couple curled together if Corvo turns back, with a [[Damien's Journal|journal]] laying beside them. Following this, there is a crank wheel that Corvo must turn to continue ahead, which can be operated by lifting away the corpse that is leaning on it. This crank will open up a passage to a cistern, where some City Watch guards will throw two corpses from above. |
[[File:Sewerssewers02.png|thumb|left|200px|The cistern.]] |
[[File:Sewerssewers02.png|thumb|left|200px|The cistern.]] |
||
| Line 56: | Line 65: | ||
Progressing on, Corvo will need to climb a chain, and there are some items at the top that can be looted. However, Corvo must be cautious of the two traps in the area that are activated by tripwires. To disable them, he can throw some debris such as an empty bottle at the wire or interact with the wire and dodge out of the way of the [[Incendiary Bolts|launched bolt]]. Alternatively, he can locate the launchers and disable them, which give one incendiary bolt each. |
Progressing on, Corvo will need to climb a chain, and there are some items at the top that can be looted. However, Corvo must be cautious of the two traps in the area that are activated by tripwires. To disable them, he can throw some debris such as an empty bottle at the wire or interact with the wire and dodge out of the way of the [[Incendiary Bolts|launched bolt]]. Alternatively, he can locate the launchers and disable them, which give one incendiary bolt each. |
||
| − | Corvo then finds a weapons stash and [[To the Lord Protector|a note to him]] from [[The Loyalist Conspiracy|the Loyalists]], which mentions that a [[ |
+ | Corvo then finds a weapons stash and [[To the Lord Protector|a note to him]] from [[The Loyalist Conspiracy|the Loyalists]], which mentions that a [[crossbow]] and a sword have been constructed for his personal use. Following this, Corvo can also unlock the door next to him with a key provided. |
[[File:Samuelwhalewrenhaven.jpg|thumb|200px|Samuel at the exit to the Dunwall Sewers.]] |
[[File:Samuelwhalewrenhaven.jpg|thumb|200px|Samuel at the exit to the Dunwall Sewers.]] |
||
| − | After sliding underneath a tripwire, the next group of guards in the sewers can be dispatched as per usual, or avoided completely by swimming underwater. Following Corvo's interaction – or non-interaction – with them, only a short tunnel separates him from the sewer exit. |
+ | After sliding underneath a tripwire, the next group of guards in the sewers can be dispatched as per usual, or avoided completely by swimming underwater. Following Corvo's interaction – or non-interaction – with them, only a short tunnel separates him from the sewer exit. Samuel will be waiting there to transport him to [[the Hound Pits Pub]]. |
==Post-Mission== |
==Post-Mission== |
||
===The Hound Pits Pub=== |
===The Hound Pits Pub=== |
||
| − | |||
[[File:Pendletonandhavelock.png|thumb|left|200px|Pendleton and Havelock meeting Corvo for the first time.]] |
[[File:Pendletonandhavelock.png|thumb|left|200px|Pendleton and Havelock meeting Corvo for the first time.]] |
||
| − | Upon approaching the Hound Pits, Samuel tells Corvo about the Loyalists and their plan, mentioning that they are hiding "right under the Lord Regent's nose." Though he worries about the City Watch breaking in one day, Samuel tells Corvo of his faith in [[Farley |
+ | Upon approaching the Hound Pits, Samuel tells Corvo about the Loyalists and their plan, mentioning that they are hiding "right under the Lord Regent's nose." Though he worries about the City Watch breaking in one day, Samuel tells Corvo of his faith in [[Farley Havelock]], assuring him that the Admiral will be able to help get Emily back and restore her to the throne. |
| − | [[File: |
+ | [[File:Dishonored Piero Corvo Mask.jpeg|thumb|200px|Piero working in his workshop.]] |
| − | The yard at the Hound Pits is relatively deserted, the only signs of life coming from [[Piero's Workshop|Piero's workshop]]. Upon entering the pub, Corvo encounters Admiral Havelock and [[ |
+ | The yard at the Hound Pits is relatively deserted, the only signs of life coming from [[Piero's Workshop|Piero's workshop]]. Upon entering the pub, Corvo encounters Admiral Havelock and Lord [[Treavor Pendleton]] as they discuss Corvo and their plans. Havelock asks Pendleton if he has ever killed anyone, to which the [[Aristocrats|aristocrat]] replies, "Only with my wit." |
| − | When Corvo approaches the two, they introduce themselves and inform Corvo of their general plans, after which he may explore the area. The Admiral suggests visiting [[Piero Joplin |
+ | When Corvo approaches the two, they introduce themselves and inform Corvo of their general plans, after which he may explore the area. The Admiral suggests visiting [[Piero Joplin]], who can be found putting the finishing touches on [[Corvo's Mask|Corvo's mask]]. After receiving his mask, Corvo can speak with [[Cecelia]], who leads him upstairs to his quarters, where he has the option of falling asleep. |
===The Void=== |
===The Void=== |
||
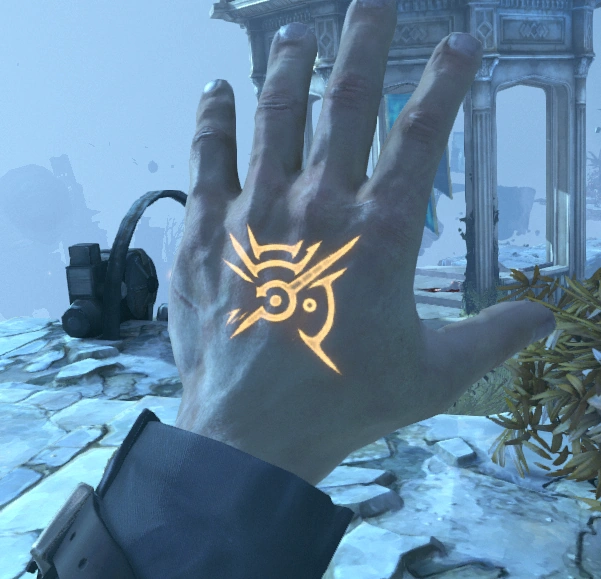
| − | [[File:Dishonored- |
+ | [[File:Dishonored-The Mark.png|thumb|200px|Corvo receiving the Outsider's mark.]] |
| − | Corvo awakens to a slightly different version of his quarters in which the windows are dark and rain can be heard falling outside. Upon realizing that something is not right, Corvo gets out of bed and finds that the Hound Pits has vanished, and he is in a bizarre, ethereal location |
+ | Corvo awakens to a slightly different version of his quarters in which the windows are dark and rain can be heard falling outside. Upon realizing that something is not right, Corvo gets out of bed and finds that the Hound Pits has vanished, and he is in a bizarre, ethereal location – [[the Void]]. He meets [[the Outsider]], who gives Corvo his [[Outsider's Mark|Mark]] and shows him how to use [[Blink]], as well as giving him a gift – "[[The Heart|the heart]] of a living thing", which can guide Corvo through his missions. |
==Side Objectives== |
==Side Objectives== |
||
| Line 82: | Line 90: | ||
==Special Actions== |
==Special Actions== |
||
| ⚫ | |||
*Discovered the Hermit's Room |
*Discovered the Hermit's Room |
||
| ⚫ | |||
*Found the Sunken Treasure |
*Found the Sunken Treasure |
||
==Trivia== |
==Trivia== |
||
| ⚫ | |||
*Corvo's cell number is B5. |
*Corvo's cell number is B5. |
||
*If many of the prison guards are killed, a pair of guards in the sewers can be heard talking about Corvo's deeds at Coldridge. |
*If many of the prison guards are killed, a pair of guards in the sewers can be heard talking about Corvo's deeds at Coldridge. |
||
| ⚫ | |||
==Gallery== |
==Gallery== |
||
| + | <div class="scrollbox"> |
||
| − | <div style="height:575px;width:675px;border:1px solid #683B35;font:16px/26px;overflow:auto;"> |
||
| − | <gallery |
+ | <gallery captionalign="center" position="center"> |
| + | Burcamp01.png|Burrows and Campbell interrogate Corvo. |
||
coldridgecell.jpg|The inside of Corvo's cell. |
coldridgecell.jpg|The inside of Corvo's cell. |
||
coldridge corvo's cell.png|Corvo's cell. |
coldridge corvo's cell.png|Corvo's cell. |
||
| Line 101: | Line 110: | ||
thug prison.jpg|A Bottle Street thug at Coldridge Prison. |
thug prison.jpg|A Bottle Street thug at Coldridge Prison. |
||
Interrogation7.png|The interrogation room. |
Interrogation7.png|The interrogation room. |
||
| + | Rat in a cage.png|Implements of torture used during Corvo's interrogation. |
||
coldridge room with safe.png|The room where the safe containing the explosive is located. |
coldridge room with safe.png|The room where the safe containing the explosive is located. |
||
coldridge safe bomb.png|The open safe with the explosive. |
coldridge safe bomb.png|The open safe with the explosive. |
||
| Line 107: | Line 117: | ||
coldridge hole in door01.png|Hole in outer door. |
coldridge hole in door01.png|Hole in outer door. |
||
Coldridge exterior daytime 1.jpg|View of Coldridge from the sewer entrance. |
Coldridge exterior daytime 1.jpg|View of Coldridge from the sewer entrance. |
||
| − | + | Dunwall sewers entrance 1.jpg|The sewer entrance. |
|
sewerssewers03.png|A tunnel rigged with tripwires attached to explosive bolts. |
sewerssewers03.png|A tunnel rigged with tripwires attached to explosive bolts. |
||
Jelly01.png|Jelly's safe and note. |
Jelly01.png|Jelly's safe and note. |
||
| Line 139: | Line 149: | ||
</gallery> |
</gallery> |
||
</div> |
</div> |
||
| + | |||
==Low Chaos Walkthrough== |
==Low Chaos Walkthrough== |
||
<gallery widths="200" captionalign="center" spacing="small" hideaddbutton="true" position="center"> |
<gallery widths="200" captionalign="center" spacing="small" hideaddbutton="true" position="center"> |
||
Dishonored, Mission 1 Dishonored (No commentary) |
Dishonored, Mission 1 Dishonored (No commentary) |
||
| − | File:Dishonored - Low Chaos Walkthrough - Mission 1 Prologue|Part 1. |
||
| − | File:Dishonored - Low Chaos Walkthrough - Mission 1 Dishonored pt 2|Part 2. |
||
| − | File:Dishonored - Low Chaos Walkthrough - Mission 1 Dishonored pt 3|Part 3. |
||
| − | File:Dishonored - Low Chaos Walkthrough - Mission 1 Dishonored pt 4|Part 4. |
||
</gallery> |
</gallery> |
||
| ⚫ | |||
| − | ==High Chaos Walkthrough== |
||
| − | <gallery widths="200" captionalign="center" spacing="small" hideaddbutton="true" position="center"> |
||
| − | File:Dishonored - High Chaos Walkthrough - Mission 1 Dishonored pt 1|Part 1. |
||
| − | File:Dishonored - High Chaos Walkthrough - Mission 1 Dishonored pt 2|Part 2. |
||
| − | </gallery> |
||
| + | [[de:Entehrt]] |
||
| ⚫ | |||
| + | [[es:Deshonrado (Misión)]] |
||
| ⚫ | |||
| + | [[ru:Невинно осуждённый]] |
||
| + | [[pl:Zniesławiony]] |
||
| + | [[fr:Déchéance]] |
||
| + | [[it:Senza Onore]] |
||
| ⚫ | |||
[[Category:Walkthroughs]] |
[[Category:Walkthroughs]] |
||
| − | [[Category:Gameplay]] |
||
Revision as of 10:51, 21 February 2019
|
Spoiler warning!
This article contains plot spoilers. If you do not yet know of this information, it is recommended that you read at your own risk or not at all. |
This article is about the mission. You may be looking for the video game Dishonored.
Dishonored is the first mission of Dishonored, in which Corvo Attano must escape from the confines of Coldridge Prison and meet Samuel Beechworth by the Wrenhaven River.
Briefing
Mission
Six months have passed since you were accused by the Royal Spymaster of murdering the Empress and conspiring to abduct her daughter Emily, the royal heir. Now, locked away in Coldridge Prison, the time of your execution draws near.
Mid-mission, Fugitive
You have escaped Coldridge Prison with the help of hidden allies. If you can reach the Wrenhaven River, they promise to aid you in your next move.
Mission Details
At Coldridge Prison

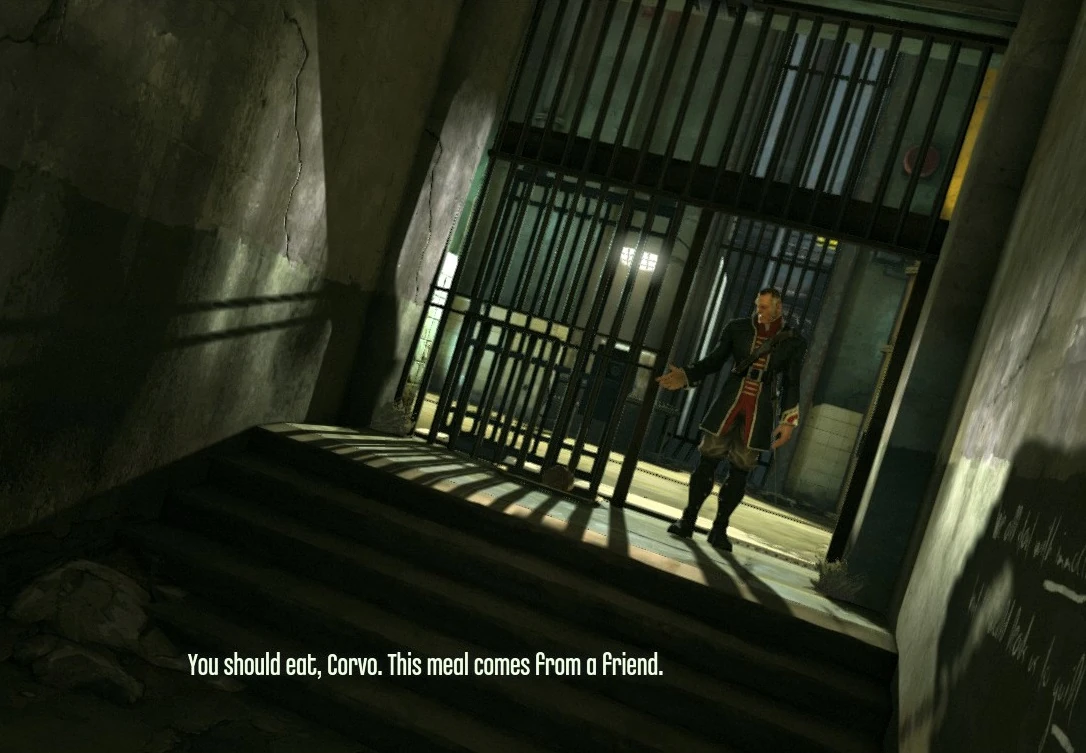
The guard at Corvo's cell.
On the eve of Corvo's execution, Watch Officer Thorpe will deliver a tray of food to his cell and urge him to eat, saying the meal "comes from a friend." Hidden underneath the bread on the tray is an anonymous message and the key to Corvo's cell.
He will then use the key to unlock his cell, and directly outside is a table with a sword on it. There are three guards patrolling the corridor ahead. The first can be eliminated and his body hidden while the latter two are conversing, but the others will require Corvo to wait until they have finished their conversation for him to dispatch them without being noticed.
There is a bridge over the corridor that leads to the yard walkway, which can be accessed by either climbing or taking the stairs. Upon climbing, a pistol can be looted from a weapons rack, along with some food and coin.
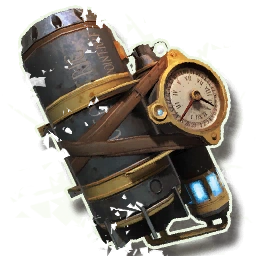
The door at the end of the bridge will be locked, and Corvo must pickpocket a guard to procure the key. That done, the walkway leads to a room with another guard and two doors after it: the interrogation room and the courtyard. The latter will be locked for the time being, until the current objective is completed. To accomplish this, Corvo must enter the interrogation room to fetch the clockwork explosive, which is contained within the safe at the back of the room.
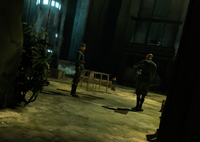
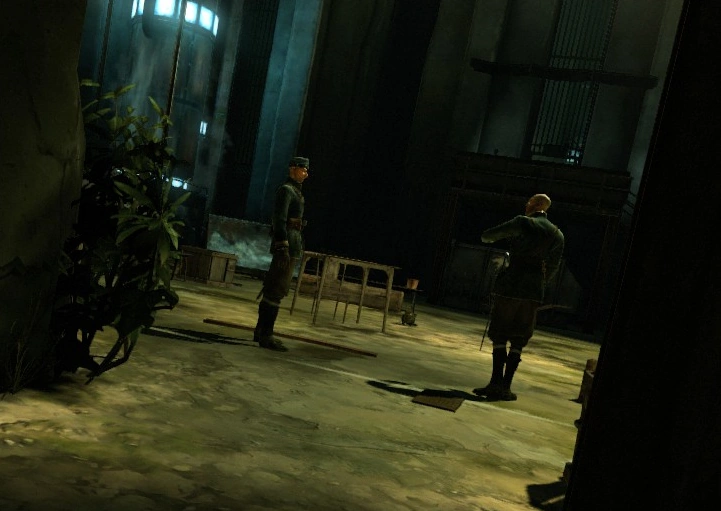
Guards conversing in the prison yard.
After fetching the explosive, Corvo will witness one of the City Watch guards entering the yard, where he will begin a conversation with a Lower Guard named Hackworth. Corvo can sneak around them by hiding behind the different obstacles in the room, or by picking each off while the other cannot see. From this point, he can take the stairs at the other end of the yard, which lead to the prison's control room.
In the control room, there will be two options available to Corvo. He can either dispatch the guards in the room and pull the lever to open the door, or he can climb onto some pipes opposite the offices and traverse into the next room. If a body is previously placed in front of Corvo's cell, it may attract the guards' attention and lure them away.
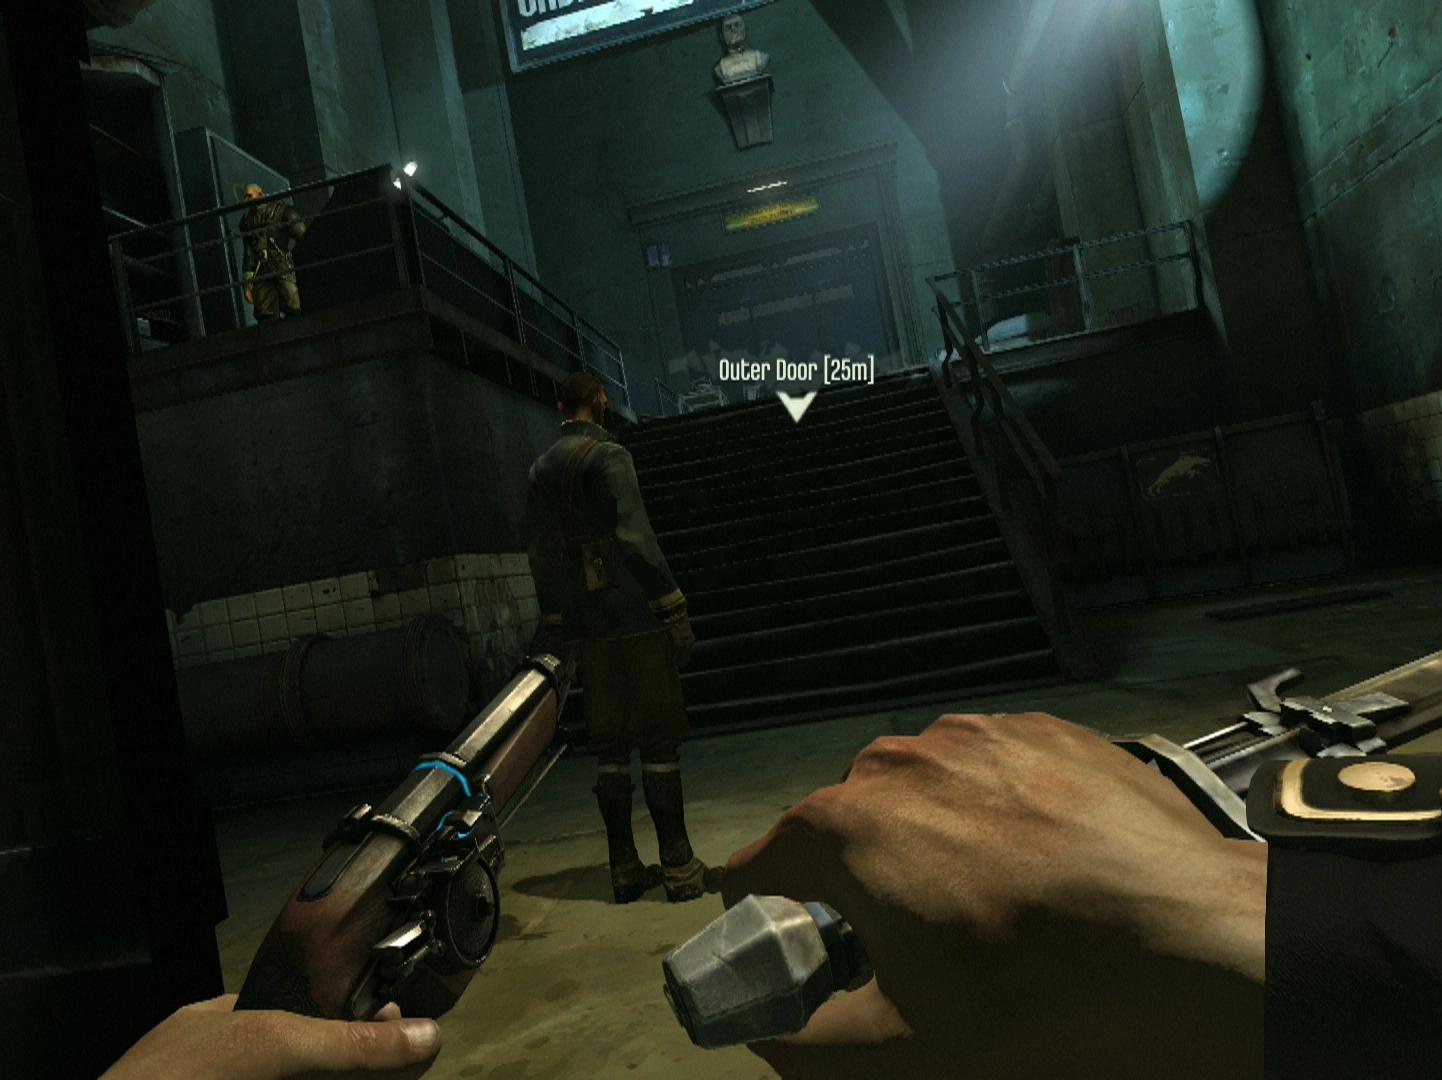

The final room and the outer door.
Corvo will need to dispatch the two guards in the room, and can then plant the explosives on the door to escape. If Corvo chose to open the door to enter the room, he can use the lever in this room to close it behind him; this will hinder any guards left in the facility from entering following the explosion, giving Corvo more time to escape or hide.
(Clean Hands note: There is a dumpster next to the outer door, and if an unconscious guard is placed in it, the explosion will kill him, locking the Clean Hands achievement/trophy. An effective hiding place is the open wolfhound cage, to the left of the gate when Corvo first enters.)
(High Chaos note: After blowing up the door, guards will spawn and enter the room, searching for Corvo. As guards are killed, new ones will spawn. There is no limit to the number of guards that can respawn at this point. Corvo can hide deep in the storage container to the left of the door, on the side closest to the wall, shielding himself from most attacks. From here he can attack the guards between their attacks.)
When the door to the prison's forecourt is destroyed, Corvo must dive into the water and swim to the sewers' entrance.
(Ghost note: There are guards watching the water after Corvo jumps off the bridge. To not be seen, he may have to wait underwater until the guards' awareness levels have dropped and then sneak to the sewers. To do this successfully may also require him to watch the guards as they change position, timing his movements accordingly. There is a chance that they will be watching for activity near the main door, at which point he can sneak past.)
Dunwall Sewers

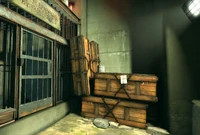
The cell and note.
Shortly after entering the sewers, there will be a note, as well as a locked gate to a cell blocking the path. Corvo will need to climb the cell and crawl through the small space overhead. A swarm of rats will convene below, and two guards on the other side of another cell door can be heard talking about Corvo. As Corvo approaches the door, the guards will open it and will be attacked and consumed by the rats.
Corvo can then descend from the top of the cell and dive into the water nearby. On swimming through the sewer outlet, there will be a dead couple curled together if Corvo turns back, with a journal laying beside them. Following this, there is a crank wheel that Corvo must turn to continue ahead, which can be operated by lifting away the corpse that is leaning on it. This crank will open up a passage to a cistern, where some City Watch guards will throw two corpses from above.
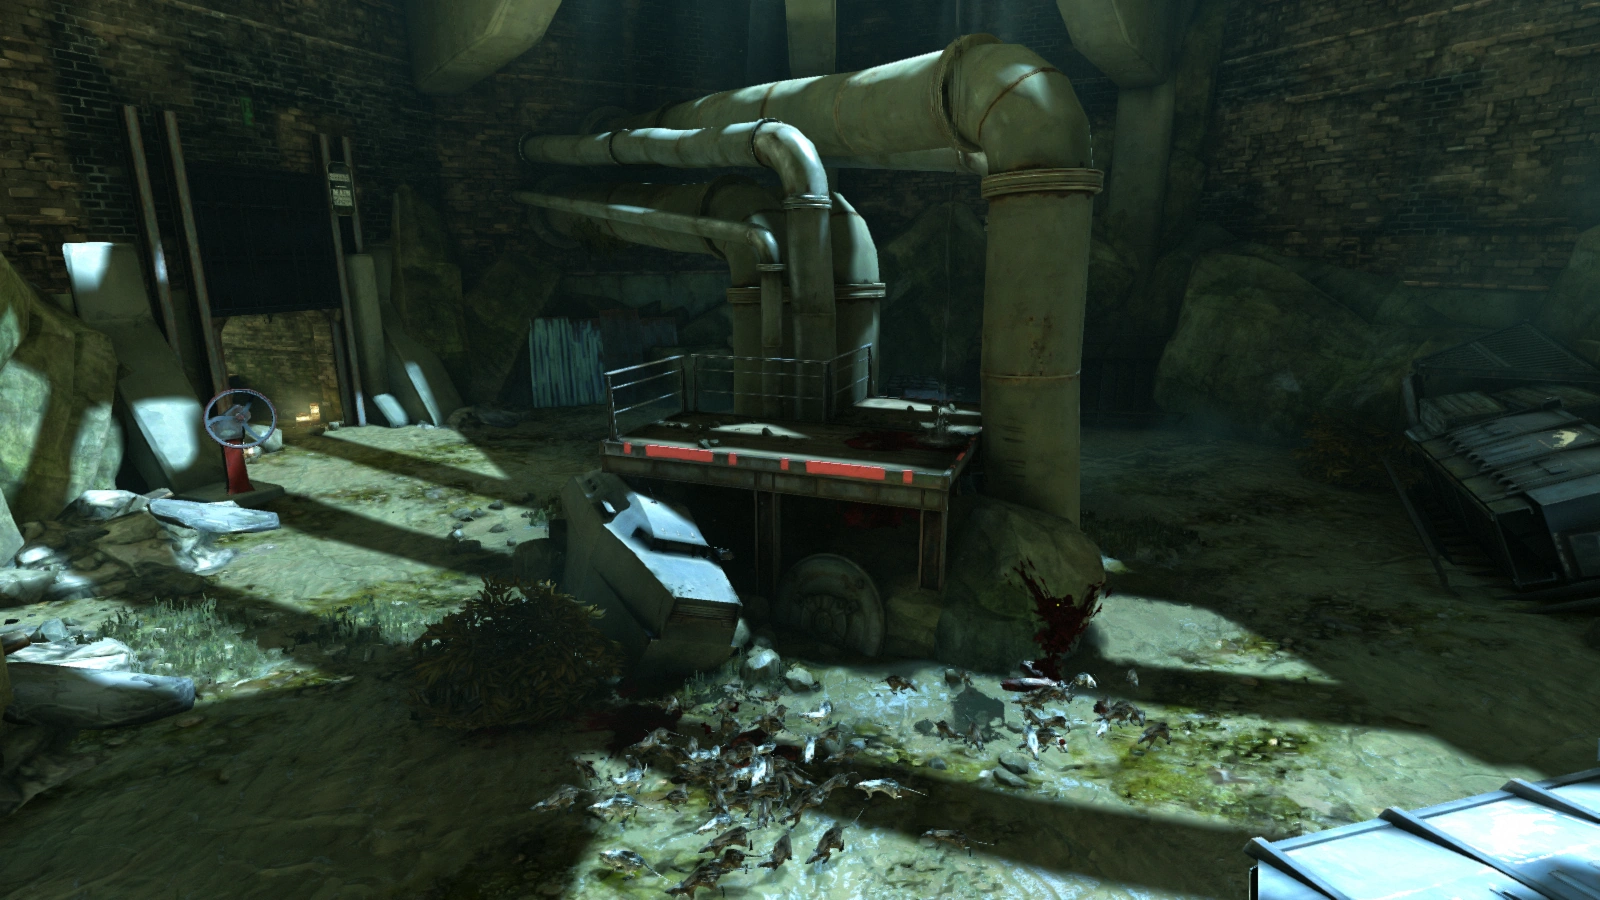

The cistern.
Corvo will need to avoid the rats by circling around the area, and then quickly make his way onto the platform in the middle. Here he can pick up and throw one of the corpses away from the crank wheel, in order to distract the rats, giving him the opportunity to open the gate.
Progressing on, Corvo will need to climb a chain, and there are some items at the top that can be looted. However, Corvo must be cautious of the two traps in the area that are activated by tripwires. To disable them, he can throw some debris such as an empty bottle at the wire or interact with the wire and dodge out of the way of the launched bolt. Alternatively, he can locate the launchers and disable them, which give one incendiary bolt each.
Corvo then finds a weapons stash and a note to him from the Loyalists, which mentions that a crossbow and a sword have been constructed for his personal use. Following this, Corvo can also unlock the door next to him with a key provided.

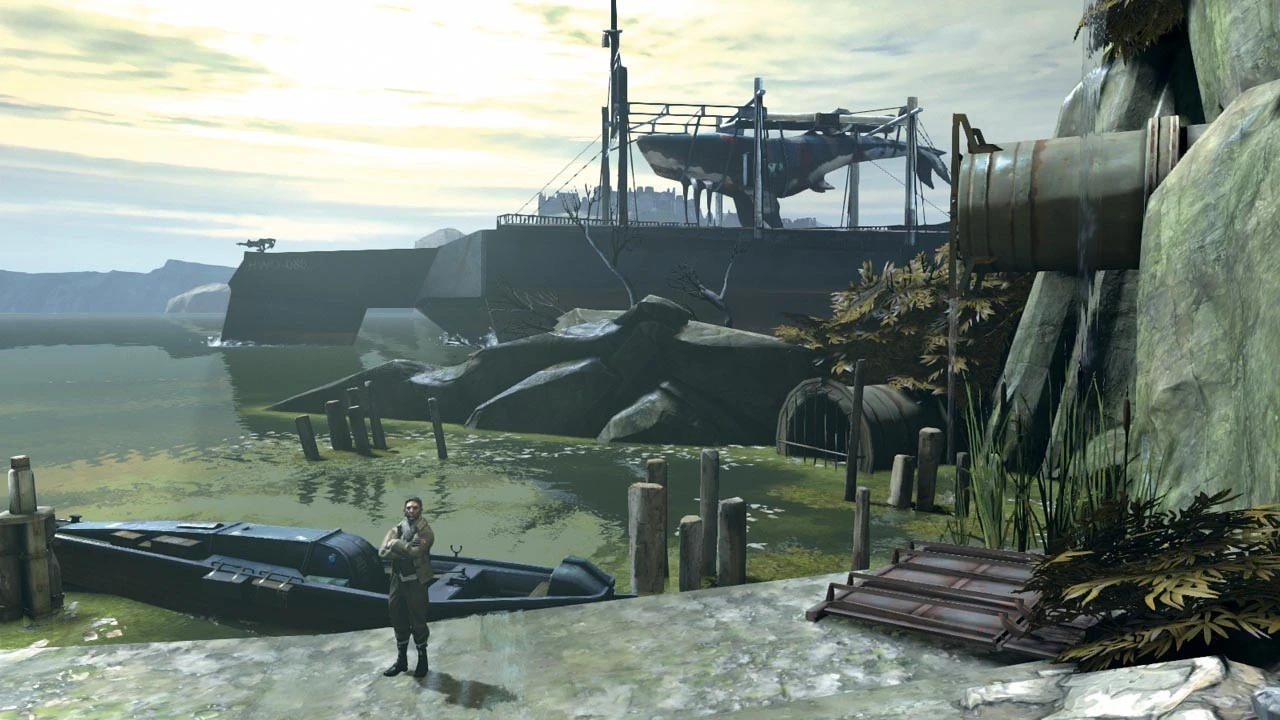
Samuel at the exit to the Dunwall Sewers.
After sliding underneath a tripwire, the next group of guards in the sewers can be dispatched as per usual, or avoided completely by swimming underwater. Following Corvo's interaction – or non-interaction – with them, only a short tunnel separates him from the sewer exit. Samuel will be waiting there to transport him to the Hound Pits Pub.
Post-Mission
The Hound Pits Pub
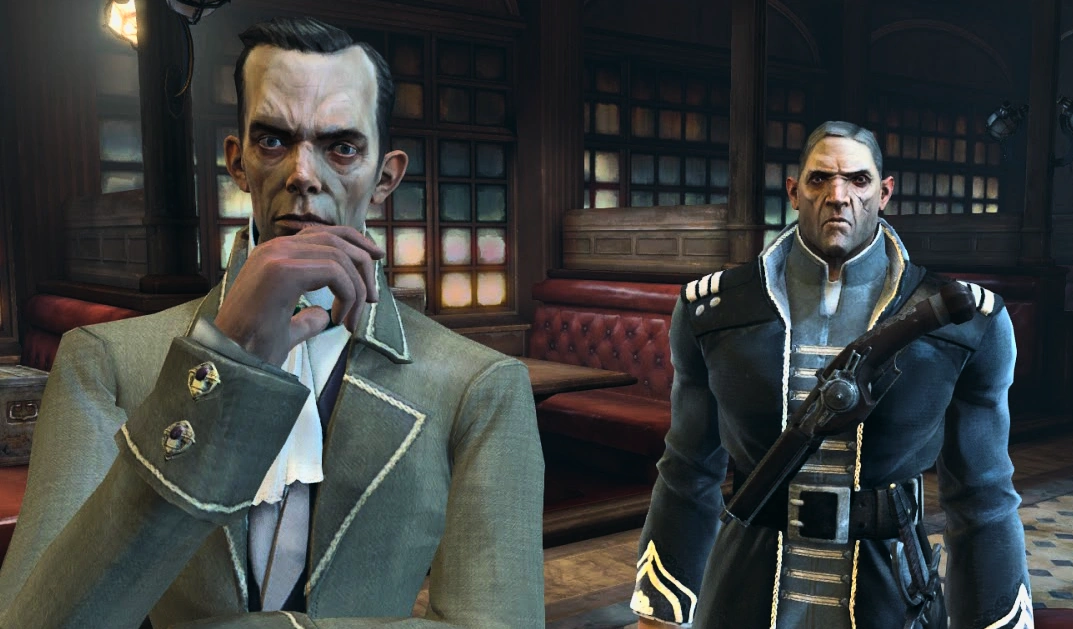
Pendleton and Havelock meeting Corvo for the first time.
Upon approaching the Hound Pits, Samuel tells Corvo about the Loyalists and their plan, mentioning that they are hiding "right under the Lord Regent's nose." Though he worries about the City Watch breaking in one day, Samuel tells Corvo of his faith in Farley Havelock, assuring him that the Admiral will be able to help get Emily back and restore her to the throne.

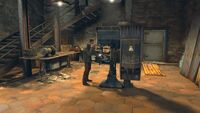
Piero working in his workshop.
The yard at the Hound Pits is relatively deserted, the only signs of life coming from Piero's workshop. Upon entering the pub, Corvo encounters Admiral Havelock and Lord Treavor Pendleton as they discuss Corvo and their plans. Havelock asks Pendleton if he has ever killed anyone, to which the aristocrat replies, "Only with my wit."
When Corvo approaches the two, they introduce themselves and inform Corvo of their general plans, after which he may explore the area. The Admiral suggests visiting Piero Joplin, who can be found putting the finishing touches on Corvo's mask. After receiving his mask, Corvo can speak with Cecelia, who leads him upstairs to his quarters, where he has the option of falling asleep.
The Void

Corvo receiving the Outsider's mark.
Corvo awakens to a slightly different version of his quarters in which the windows are dark and rain can be heard falling outside. Upon realizing that something is not right, Corvo gets out of bed and finds that the Hound Pits has vanished, and he is in a bizarre, ethereal location – the Void. He meets the Outsider, who gives Corvo his Mark and shows him how to use Blink, as well as giving him a gift – "the heart of a living thing", which can guide Corvo through his missions.
Side Objectives
- During his time in the sewers, Corvo will come across a safe, with a note that provides a hint on how to open it. The combination for the safe can be located nearby, behind a shelf of whiskey bottles.
- In the final part of the sewers that contains guards, there is a small hermit's hovel that can be found by breaking a wooden barrier. Inside are some lootable items and a note. Corvo can also access this area by walking on the pipes above, then jumping down into the room. The room can then be escaped by climbing the debris near the wall. This allows access without breaking the boards, which would likely alert any guards.
- After walking out into the open from the sewers, Corvo can dive into the water. At the bottom is a chest that can be opened and yields 80 coin.
Special Actions
- Opened Jelly's Safe
- Discovered the Hermit's Room
- Found the Sunken Treasure
Trivia
- Corvo's cell number is B5.
- If many of the prison guards are killed, a pair of guards in the sewers can be heard talking about Corvo's deeds at Coldridge.
- If Corvo enters the Hound Pits for the first time from the second story window leading into the servants' quarters, he will startle Lydia, who can be found staring from the window as she does her rounds.
Gallery
")
")
")
")
")
")
")
")
")
")
")
")
")
")
")
")
")
")
")
")
")
")
")
")
")
")
")
")
")
")
")
")
")
")
")
")
")
")
")
")
")
")
")
")
Low Chaos Walkthrough
 (21 KB)")