(Editing a gallery) |
(Editing a gallery) |
||
| Line 156: | Line 156: | ||
<gallery captionalign="center" position="center"> |
<gallery captionalign="center" position="center"> |
||
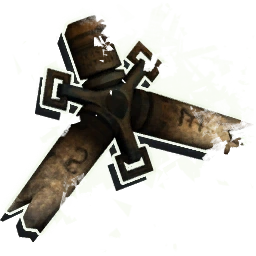
images (1).jpg|A whalebone charm as it appears in ''Team Fortress 2''. |
images (1).jpg|A whalebone charm as it appears in ''Team Fortress 2''. |
||
| − | Dishonored-Corvo Locating a BoneCharm.jpg|Corvo Locating a Whalebone Charm. |
+ | Dishonored-Corvo Locating a BoneCharm.jpg|Corvo Locating a Whalebone Charm using The Heart. |
</gallery> |
</gallery> |
||
{{Navbox Equipment}} |
{{Navbox Equipment}} |
||
Revision as of 05:57, 27 November 2012
Whalebone charms (or simply bone charms), are mystical charms created from the bones of whales. Corvo Attano can discover these trinkets throughout Dunwall and change which he has equipped at will.
In the days before the empire, whalebone charms, as well as other bone charms, including those made from the tusks of walruses in Tyvia, were generally tolerated by the rulers of the Isles, as their effects were said to improve the lives of lowly serfs. However, with the industrial revolution resulting from whale oil having gripped the Isles, the Abbey of the Everyman has now banned the use of said charms, citing that the advancement made in previous years negate the need for "magic-based" luck, and that the current technology offers no excuse for Bone Charms, considered "witchery". However, sailors out in the vast ships and whaling trawlers continue this tradition, albeit clandestinely, as the Abbey has made a habit of grinding Bone Charms to dust within its workshops.
They grant permanent enhancements, from improving the effects of elixirs, swimming speed, or jump height, to allowing Corvo to recuperate when he is near to fountains, and strengthening his supernatural abilities.
Each playthrough of Dishonored spawns only 26 random whalebone charms, out of 36 available. Corvo starts with three slots to equip charms in, but he can purchase more at The Hound Pits.
Charms spawn randomly. They are chosen when the level is loaded so reloading right before obtaining one will always yield the same charm.
Notable exception to this include:
- The charm stuck in the vice (behind the High Overseer's mansion). Saving, grabbing it then reloading will have different results. This is very useful for attempting a ghost/low chaos/clean hands playthrough as the Strong Arms charm is a tremendous help.
- The charm you get from Daud in Mission 7, either through pick-pocketing or by defeating him in combat and looting his corpse. It is much harder to pick pocket it undetected, but it is easier to manage with Bend Time Level II and Blink.
Charms and effects
- Acrobat - Slightly faster climbing.
- Albinos - Increased chance of white rats.
- Blood Ox Heart - Slight increase to maximum mana.
- Carrion Killer - Killing rats grants some adrenaline.
- Clockwork Malfunction - Enemy grenades take slightly more time to explode.
- Falling Star - Drop assassinating grants a small amount of mana.
- Fleet Fighter - Drawn weapons do not slow movement speed.
- Golden Touch - Slight increase to value of precious items.
- Healthy Appetite I - Food heals slightly more.
- Healthy Appetite II - Food heals moderately more.
- Plague Affinity - Damage by weepers grants a small amount of mana.
- Plague Resistant - Weepers inflict slightly less damage.
- Rat Scent - Rats attack only when approached in close proximity.
- Reinforced Bolts - Bolts stuck in enemies break less often.
- Robust I - Potions grant slightly more health.
- Robust II - Potions grant moderately more health.
- Scavenger - Greater amounts of ammo on discovery.
- Spirited I - Potions grant slightly more mana.
- Spirited II - Potions grant moderately more mana.
- Spiritual Pool - Slightly faster mana regeneration.
- Spirit Water - Drinking from faucets recharges a small amount of mana.
- Strong Arms - Faster choking speed.
- Sustained Rage - Adrenaline takes slightly longer to cool down.
- Swift Shadow - Increased movement speed in stealth mode.
- Throwing Hand - Thrown objects travel slightly further.
- Tough Skin - Slight increase to maximum health.
- Twist of Fortune I - Very rarely, using a potion grants full mana.
- Twist of Fortune II - Sometimes, using a potion grants full mana.
- Undertaker - Increased movement speed while carrying a corpse.
- Unnerving Target I - Enemies have a slight chance to miss with guns.
- Unnerving Target II - Enemies have a moderate chance to miss with guns.
- Vengeance - Being damaged grants a small amount of adrenaline.
- Water of Life - Drinking from fountains grants a small amount of health.
- Welcoming Host - Increased possession time for white rats.
- Whirlwind I - Swing speed for swords is slightly faster.
- Whirlwind II - Swing speed for swords is moderately faster.
DLC charms and effects
They appear in Corvo's room in the The Hound Pits after first meeting the Outsider.
- Acrobatic Killer: Raven - Drop assassinating grants health.
- Acrobatic Killer: River Affinity - Increased swimming speed.
- Acrobatic Killer: Quick Dodge - Ability to dodge bolts/arrows.
- Arcane Assassin: Gutter Feast - Eating white rats grants mana.
- Arcane Assassin: Void Channel - Improved duration/damage for powers.
- Arcane Assassin: White Rat Friend - White rats are unhostile.
- Backstreet Butcher: Blast Resistant - Reduced damage from explosions.
- Backstreet Butcher: Fencer - Advantage in sword vs. sword combat.
- Backstreet Butcher: Fire Water - Increased explosion range for whisky bottles.
- Shadow Rat: Deep Breather - Increased underwater breath duration.
- Shadow Rat: Delicate Touch - Reduced noise for breaking glass.
- Shadow Rat: Voyeur - Magnification of sight when peeping through keyholes.
Locations
| Available mission | Map | Location |
|---|---|---|
| High Overseer Campbell | Distillery District | The bridge where guards are dumping bodies, on the other side of the metal gate. Swim to the back and climb up a chain to reach it. |
| Second floor of the building where Griff is being imprisoned. | ||
| Dunwall Whiskey Distillery | On top of the wine cellar, requires one to jump/blink over the barrels to reach. | |
| Backyard | In warehouse A, access from above. This charm is always random before you turn the vice to release it. | |
| In a house near the river, you will need to access from a window facing the river. | ||
| House of Pleasure | Distillery District | In the apartment where a weeper and an assassin reside, there are several ways to go up but all require jumping or blink. |
| In Granny Rags' new home, access through the bottom street. The settlement also hold a door leading to Golden Cat backdoor. | ||
| In Captain Chair Hotel under the stair. The key can be obtained by Slackjaw by finishing his first quest. Alternatively, the door to Golden Cat is never locked. | ||
| The Golden Cat | in the room directly above Madam Prudence's office, access by getting the Golden Cat master key. The charm is above the fireplace. | |
| Dunwall Whiskey Distillery | In a room next to the entrance to the distillery. The key can be obtained in the room opened by the wheel. Alternatively, several weepers will be in the room if you contaminated the elixir production and will break out after you have spoken to Slackjaw. | |
| The Royal Physician | Southern Bridgeway | In a room with a weeper. This room is beside a security station with a controllable metal bridge. You will see it if you go to collect the rune in this map. It is also connected to the side door near the area exit. |
| Midrow Substation | After you have passed the Wall of Light, enter the building on your left from above. The charm is at the bottom with a corpse. | |
| North End | In the building on your left as you enter this area. The building itself can be accessed by using blink on second floor. However to reach where the charm is require one to go to the top and get around with vents and pipes because it is blocked. | |
| Lady Boyle's Last Party | Hound Pits Pub | After you reach Hound Pits Pub, answer you will say goodnight to Emily Kaldwin when Farley Havelock tells you to rest. Talk to Cecelia and retrieve the key under her bed to the Abandoned Apartment. The charm is under a bed in the apartment. |
| Estate District | In a weeper-infested apartment with a rune and an Outsider shrine nearby. Note that this area has three weepers patrolling. | |
| In a building very close to the Boyle Mansion. There is a door directly facing a window of the guardhouse. You can also enter from the ground floor. | ||
| Return to the Tower | Exterior | In a tunnel in the Waterlock, accessed by using blink (tier II) from the opposite tunnel or reach the end of that tunnel and navigate through the platform there. It is under a corpse. |
| Dunwall Tower | In Jessamine Kaldwin's secret chamber on the second floor. opened by interacting with the unlit candle beside the fireplace. | |
| The Flooded District | Rudshore Waterfront | In a house near the end of the street (leading to The Refinery). An assassin will occasionally be on top after you have retrieved your gear. |
| The Refinery | At the building where your gear is. Once you activate the stairs, go to the top of the staircase, it will be under a collapsed walkway as you go around. | |
| Central Rudshore | At the far end of the main street on the ground, guarded by two wolfhounds. | |
| In Daud's pouch, either steal or loot from him. It will be hidden from The Heart and doesn't "sing". | ||
| Gateway Tunnel | Immediately after you enter the area, turn right. It will be surrounded by a swarm of rats. | |
| Old Port District | In front of some wooden plank, there will be a house with lights on. Enter the house and you will find it behind collapsed floor on the second floor. | |
| In the sewer, in a room on your way to Granny Rags and Slackjaw (i.e. the sewer master key). The safe combination required to take the charm is hinted by the letter and book beside the safe. | ||
| After going through the sewer gate into the plague victim's settlement. It is sitting by the end of the settlement. Note that the victims here will become weepers at high chaos. |
Gallery
")
Template:Navbox Equipment |}